
I made this for a 4th of July party the other day, and it was such a hit (if I do say so myself!) I figured I'd better write down the recipe and share it before I forget what I did. I found the original version of this on Bon Appetit's website - I love desserts made with meringue layers, and I love the idea of putting peanut butter into a fancy sounding concoction like a dacquoise, which is usually hazelnut meringues layered with buttercream or whipped cream.
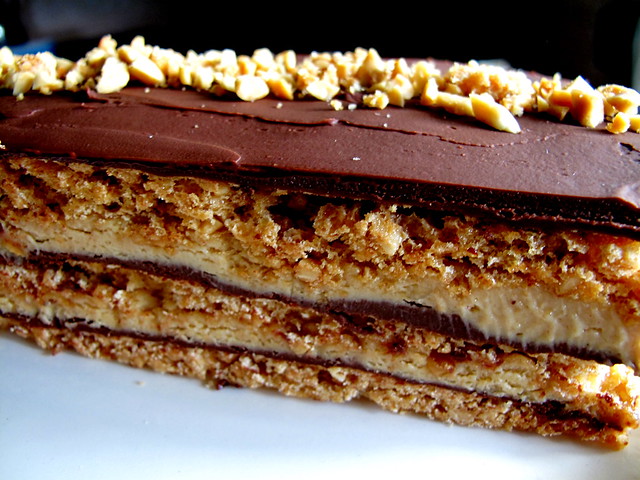
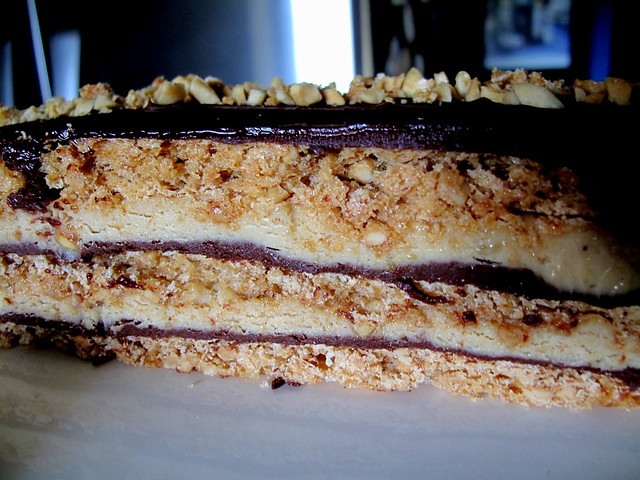
The main differences between my version and the original are that I froze it and I added more peanut butter to the mousse layers. I also changed a few things about the method and order of steps in the recipe. Don't let the layers scare you away - this really is not difficult at all. The finished dessert is cold, creamy, crunchy, smooth, salty and sweet - with the peanut mousse accented by crisp/chewy layers of meringue and velvety ganache. It's a little like a Vienetta, that layered frozen ice cream cake that's only available in Europe now, but about 10 times better. Definitely something to make when you have people to share it with, lest you eat it all yourself. (If you're anything like me, anyway.) This recipe makes two desserts - each one serving about 8-10 people. That is a lot, but given how popular as it was and how long it keeps in the freezer, I don't think you'll have to worry about getting rid of it.
Frozen Chocolate Peanut Dacquoise
adapted from Bon Appetit
Ingredients:
meringue layers
2.5 cups salted peanuts (I used Trader Joes crunchy peanuts - the original recipe suggested skin on Spanish peanuts. I'd use anything but dry roasted.)
1.5 cups of sugar, divided into 1/2 cup and 1 cup
10 large egg whites at room temperature
1 tsp vanilla extract
mousse
1.5 cups salted chunky natural-style peanut butter
.5 cup (packed) golden brown sugar
2 cups well-chilled heavy whipping cream, divided
sea salt
glaze
.25 cup natural unsweetened cocoa powder
.25 cup sugar
1 cup heavy whipping cream
1 1/3 cups bittersweet chocolate chips
Pinch of fleur de sel or sea salt
Preparation:
1) Make the chocolate ganache glaze:
Whisk cocoa powder and sugar in medium saucepan. Gradually add 1/4 cup water, whisking until smooth. Whisk in heavy cream. Bring to boil (or near boil) over medium heat, whisking frequently. Reduce heat to low. Add chocolate and whisk until melted and smooth. Stir in the pinch of salt. Let stand at room temperature until cool and slightly thickened, stirring occasionally, about 2 hours
2) Make the mousse:
Using an electric mixer with the whisk attachment, beat 1 cup of whipping cream until stiff peaks form. Remove to a large shallow bowl and chill. Put peanut butter and brown sugar in the mixer (using the whisk attachment) and blend until smooth. With mixer running, gradually beat in 1/2 cup cream. Add another 1/2 cup cream and beat just to blend. The mixture should be smooth and runny. Fold peanut butter mixture into whipped cream in 3 additions. When the mixture is almost blended, taste it and fold in some finely ground sea salt to taste - it will depend on how salty your peanut butter is. Chill until ready to use.
3) Make the meringue layers:
Preheat oven to 275°F. Line large baking sheet with parchment paper, or if you have them, use Silpats to prevent sticking.
Grind the nuts with 1/2 cup sugar in processor until the mixture looks like coarse breadcrumbs. Line two half sheet size jelly roll pans with parchment or Silpats.
Using electric mixer with the whisk attachment, beat egg whites until foamy. With mixer running, gradually add remaining cup of sugar, beating until meringue is stiff and glossy but not dry. Add ground nut mixture and fold gently just to blend. Immediately spoon meringue onto parchment or silpats and spread to form 3 uniform rectangles in a row on each pan about half an inch thick, using about 2 cups meringue per rectangle.
Immediately bake meringues until light golden brown all over and dry to the touch, about 1 hour 20 minutes. Transfer to rack and allow to cool slightly - if using parchment, remove the parchment while the meringues are still slightly warm and then allow to cool completely.
To assemble:
Line a flat plate or serving platter with a piece of wax paper or parchment and set one meringue on top. Spoon glaze evenly over the top of the meringue and spread by pushing to the edges using a small offset spatula. Top with a layer of mousse about 1/3 inch thick. Set another meringue on top and continue to layer until you have three layers of all 3 components - ending with ganache. (If at any point during this process your mousse or glaze become runny - just refrigerate everything until they firm up again.) While glaze is still soft, top with a line of chopped peanuts running down the center. If you have leftover glaze, save it.
Place the desserts in the refrigerator 6-8 hours or overnight. During this time the meringue will soften a bit. Use a sharp heavy knife to trim rough edges of entire dessert to form a perfect rectangle. Clean the knife as needed with hot water to keep the edges neat. I think it's pretty with the sides exposed to show the layers, but if you want to, you can also re-warm the leftover glaze and use an offset spatula to spread it over the sides after you trim it.
Using a spatula, transfer dessert from parchment paper to a serving plate or platter. (If you have some leftover ganache handy, you can use a dollop to anchor it to the plate.) Freeze uncovered for half an hour to an hour. Once the outside of the dessert has hardened, wrap it well in plastic wrap, and return it to the freezer until ready to serve. To serve, slice into portions while still frozen.


That looks delish!!
ReplyDeleteLisa~~
Cook Lisa Cook
Got any more in the freezer?
ReplyDeleteWhoa, this looks like heaven to me!! Perfect summer dessert!
ReplyDeleteSues
This could possibly be the perfect dessert.
ReplyDeleteThis chocolate peanut dacquoise looks quite tasty. Thanks for the post (and the mouth-watering pictures).
ReplyDeleteOh my God this looks so good and i`m sure that it is delicious too. I think it is not a very difficult recipe so i will give it a try, thanks a lot for sharing.
ReplyDelete