Showing posts with label home cooking. Show all posts

Wednesday, July 25, 2012

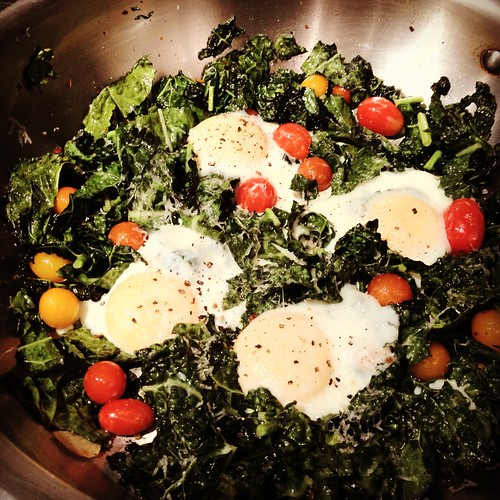
Kale with Baked Eggs & Cherry Tomatoes

8DDEC82B-6EA7-4309-A648-1BA9168151AE.JPG
I posted this photo over on Instagram earlier this week when I made this for dinner, and it received such an enthusiastic response I thought I'd post the recipe over here.  It was inexpensive, delicious, easy, healthy and quick - all the things you want in a weeknight meal! Hope you are eating well this week!

Kale with Baked Eggs & Cherry Tomatoes
Serves 2

Olive Oil (decent quality, but not necessarily your very best)
1-2 garlic cloves, thinly sliced
red pepper flakes

A handful of cherry tomatoes - halved if more than 1/2 inch across
A Head of Kale - thinly sliced crosswise down to the point where the center ribs become thick  (if the center ribs are especially large, remove them before slicing)
4 eggs

Salt, Pepper & fresh Reggiano Parmesan cheese for grating & lemon if desired

Heat the oven to 400 degrees.  In a medium/large oven-safe frying pan, gently heat enough oil to coat the bottom of the pan with a tiny bit of depth - about an eighth of an inch.  Add a few generous shakes of chile flakes and the sliced garlic and cook gently for five minutes over medium heat, to infuse the oil with the flavors.  If the garlic starts to brown, the heat is too high.  (Remove any garlic slices that burn or turn deep brown.)

Add the cherry tomatoes to the hot oil and cook about 3 minutes, until slightly softened.  Add the sliced kale and toss with the hot oil to coat.  When the kale just starts to wilt, crack the eggs into the pan and put the pan into the oven.  Set the timer for 10 minutes and turn the oven light on.  Cook until the eggs are just opaque but still runny (the yolks should jiggle if you shake the pan.)  Remove from the oven and grate a generous amount of parmesan cheese over the whole thing, and season with salt and pepper and a squirt of lemon on the kale.   Serve with toasted baguette or sourdough bread.   (You can also just put a lid on the pan and cook the eggs that way if you don't want to turn on your oven, but the kale may get a little brown.)


Monday, December 19, 2011

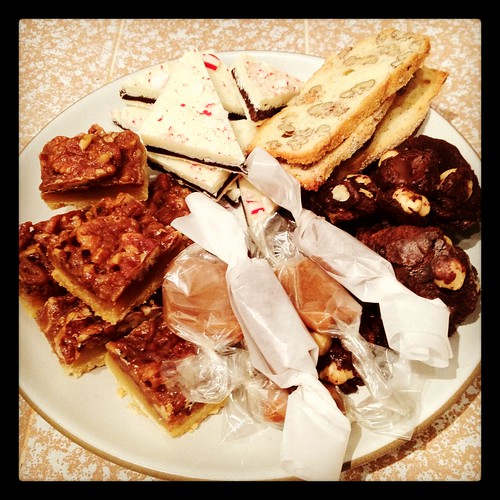
Holiday Treats!

F39D15BC-C2DE-40D0-9777-868DD4E1CD70.JPG
Jora and I were busy little bees this weekend.  Have you ever done your holiday baking with a friend?  I highly recommend it!

Sweets:  clockwise from top -  Peppermint bark, mandelbrot (made by my mom), Mozza's chocolate hazelnut maltagliati, vanilla bean fleur de sel caramels, and caramel pecan shortbread.

Savories:  (not pictured)  cheddar cayenne crackers, blue cheese and walnut crackers, bourbon soaked cherries, and Nancy Silverton's roasted almonds with salt and olive oil.

Monday, March 07, 2011

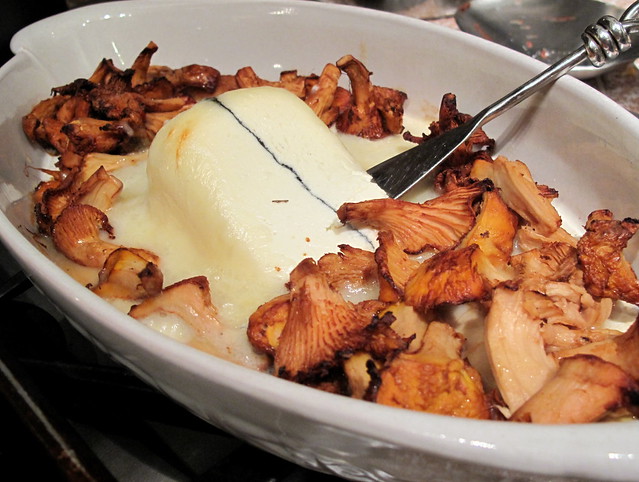
Melted Humboldt Fog with Chanterelles

Melted Humboldt Fog with Chanterelles
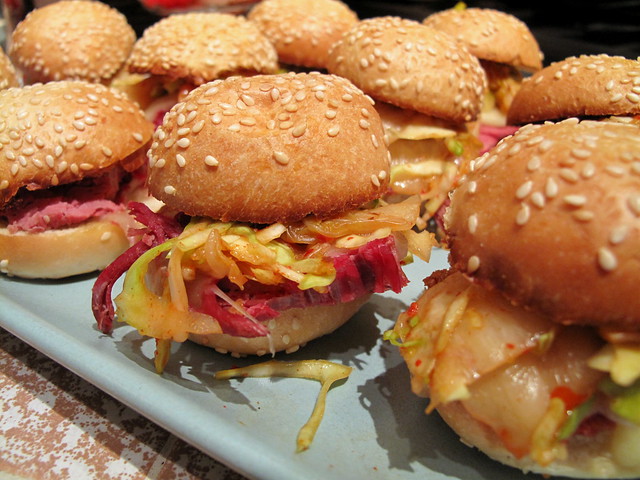
Wow, where did last week go? That was fast. On Saturday night we had a few people over to watch a movie. This is kind of a new thing - a monthly "Film Club" based on one our friend Tom started in San Francisco. Tom put an ad on Craigslist and invited strangers, and so far we've just stuck to friends, but if our friends keep canceling at the last minute, we may rethink that strategy. Anyhoo, we did it on a Saturday night this month, so I stepped up the food a bit. Normally it's just some "snacky bits" as we call them in this house - popcorn, olives, cheese, crackers, maybe something sweet. This weekend I did some Corned Beef and Cabbage Sliders (made with kimchi), a shaved Cauliflower and Fennel Salad with Caper Vinaigrette and something that is seriously the best and easiest "dish" you'll ever eat. (Provided of course that you like goat cheese!) Humboldt Fog cheese, heated until melted and bubbling.
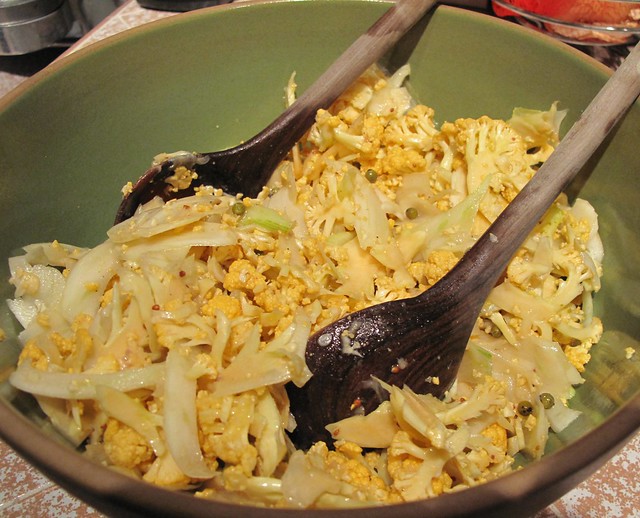
Shaved Cauliflower and Fennel Salad with Caper Vinaigrette
It's delicious enough cold, but when it's heated, the gooey outer later melts and turns to liquid (and bubbles and browns if you leave it in long enough) and the middle becomes almost soufflé-like. I first tried this when it was on the menu at JRDN, and when the Fresh and Easy down the hill from us carried it, we had it maybe once a month for dinner with a salad and some bread. When they stopped carrying it, I stopped going there. It isn't cheap, but on balance, given it's ease and deliciousness - I say it's worth it.
Corned Beef and Cabbage Sliders
If you can get your hands on some (I think they're just about to go out of season) - Chanterelles are fabulous with it - but any mushroom will do. Just toss with a little olive oil and arrange in the dish around the cheese. Bake at 400 until hot and bubbly. That's it, that's all!

I made the sliders with Trader Joes Corned Beef, sliced and piled on their little slider buns with swiss cheese. I ran them under the broiler to melt the cheese, and topped them with well-drained kimchi slaw and a bit of mustard. The salad is shaved cauliflower and fennel, tossed with a mustard vinaigrette with a bit of anchovy paste, lots of lemon juice and a spoonful of capers!


Monday, February 21, 2011

Chez Panisse Blood Orange Upside Down Cake with Cardamom Whipped Cream

Blood Orange Upside Down Cake
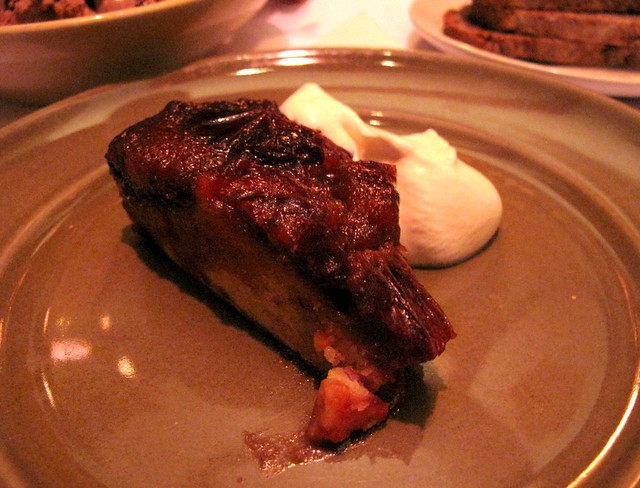
Let me just say right off the bat, that it is incredibly difficult to take a good photo of an upside down cake. Which is why I'm giving you a photo of the one I had at Chez Panisse Cafe a year ago, rather than the one I made myself.  I promise you, they looked exactly the same.

I have actually been waiting with bated breath for blood orange season to come around again so that I could both make this again and share it with you. It's really pretty simple, a buttery cake batter poured over brown sugar, butter and blood orange slices in a cast iron skillet.  Still, there is something deceptively ingenious about the combination of cardamom with the blood oranges and brown sugar topping.  It's a strange harmony that keeps pulling you back in, bite after bite.

As soon as I returned home, I started looking for a recipe, and found one on David Lebovitz' website.  Since he used to work at Chez Panisse I figured it must be the real deal.  Indeed - when I made it at home, it was every bit as good as it had been at the restaurant.  He has since pulled the recipe from his site, but he has another one up that can be used for various types of fruit, etc. and does not include the cardamom.  Luckily I had saved it the first time around - so when blood orange season rolled around again, I was ready to go - and now you are too.  :)
Blood Orange Upside Down Cake
Chez Panisse Blood Orange and Cardamom Upside Down Cake with Cardamom Whipped Cream Adapted from David Lebovitz

David's recipe called for a lot of cardamom - in the topping, the cake and the whipped cream.  I definitely think it should be included in the cake, but I can live without it in the topping or the cream.   If you decide to add it to either or both, 1/2 teaspoon will do the trick.

Topping:
3 tablespoons unsalted butter
3/4 cup firmly packed light brown sugar
3 medium-sized blood oranges, peeled and sliced 1/4-inch thick
1/2 teaspoon ground cardamom (optional)

Batter:
1 1/2 cups all-purpose flour
1/2 teaspoon salt
1 1/2 teaspoon baking powder
1 1/2 teaspoons ground cardamom
6 tablespoons unsalted butter, softened
2/3 cup granulated sugar
2 large eggs, at room temperature
1/2 cup whole milk
1 teaspoon vanilla extract
grated zest of 1 orange

Whipped Cream
1 cup heavy cream
1-2 Tbsp powdered sugar
1/2 tsp ground cardamom (optional)

1. Preheat oven to 350 degrees. Center rack in oven.
2. In a 9 inch cast iron skillet, melt the butter and the brown sugar (along with 1/2 teaspoon of cardamom if using) until smooth. Remove from heat and allow to cool slightly.
3. Lay the orange slices in concentric circles over the brown sugar mixture.
4. In a small bowl, stir together the flour, salt, baking powder, and ground cardamom. In a measuring cup, combine the milk, vanilla and orange zest.
5. Using the paddle attachment, cream together the butter and sugar with an electric mixer until light and fluffy. Add the eggs one at a time and thoroughly incorporate into batter. Scrape down sides of bowl as needed.
6. Stir in half of the dry ingredients, then the milk mixture. Mix in the remaining dry ingredients until just combined.
7. Line the lower rack of the oven with aluminum foil to catch any drips.  Pour batter over the oranges and even out with a spatula or knife.
8. Bake for 40 minutes or until the top is firm to the touch and a toothpick inserted in the center comes out clean. 
8. Allow the cake to cool for 15 minutes. Place serving platter over skillet and flip carefully while still hot.  

Serve warm or at room temperature with whipped cream.  This is definitely best eaten the day it's made. Leftovers will keep for a couple of days, but the cake will become progressively more soggy.

Tuesday, January 11, 2011

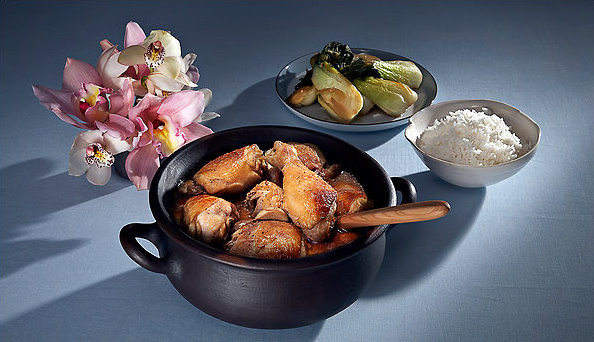
The Chicken Adobo Experiment

adobo

Maybe you also saw this piece in the New York Times Magazine this past weekend?  These recipes almost always look intriguing, but it's rare for me to run right out and buy the ingredients for something like I did for this. I don't know what it was about it, but I just had to make this, NOW.  I'm glad I did, too.  It was absolutely delicious, and pretty darned easy.  It was something completely different for me, and I don't run across too many meals I can say that about these days.  It's also a great way to use chicken thighs and legs - which generally cook up a little too rubbery for me in any preparation but a braise, and you probably have most of the ingredients in your pantry already - though you may have to buy another bottle of rice vinegar. (It uses a whole one.)

I modified the recipe to use the whole can of coconut milk and - inspired by the article -  added a few ingredients of my own to give it a little zing.  The result was rich, tangy, spicy, complex and strangely addictive. I was inspired enough to run right over here and type this up - both to share it with you fabulous people, and to make sure I don't forget what I did, since I definitely plan to make it again!

Chicken Adobo
adapted from Sam Sifton, who in turn adapted it from Amy Besa and Romy Dorotan of the Purple Yam restaurant in Brooklyn.

1 can coconut milk  (I used regular, but I am pretty sure light would also be fine)
1/3 cup soy sauce
1½ cups rice vinegar (one 12 ounce bottle)
1 Tablespoon dark brown sugar*
1 Tablespoon of good balsamic vinegar*
1/2 tsp ground red pepper*
1/2 tsp turmeric*
1 thumb-sized piece of ginger, peeled and cut into chunks roughly the size of the garlic cloves*
12 whole garlic cloves, peeled  (you could probably use 4-6 and smash them but leave them whole for the same effect)
2 whole serrano chilis or other hot chilis (original recipe calls for Bird chilis) split open and seeds removed with a paring knife. 
3 bay leaves
several grinds of freshl black pepper

3 to 4 pounds (8-10 pieces) bone-in chicken thighs.

Jasmine rice

1. Combine all ingredients with chicken in a large 5 quart dutch oven or stock pot.  Cover and refrigerate for at least four hours or overnight. 

2. Place pot containing chicken and marinade on the stove over medium-high heat and bring to a boil. Reduce heat to a simmer and cook, stirring occasionally, until the chicken is cooked through and tender, around 30-40 minutes.

3.  Remove chicken pieces from pot and place on a foil lined sheet pan - set aside.  Skim excess fat from sauce, and use a slotted spoon to remove garlic cloves, ginger, chilis and bay leaves.  Simmer sauce over medium-high heat until it reduces and thickens slightly, about 10-15 minutes.   While the sauce simmers, preheat the broiler and cook the rice according to package directions. 

4. When the sauce is thickened and the rice is ready, broil the chicken pieces for about 5 minutes, until they begin to brown and caramelize.  To serve, spoon rice into shallow bowls, top with chicken, and pour sauce over. 

* = my additions
photo credit - NY Times

Monday, December 20, 2010

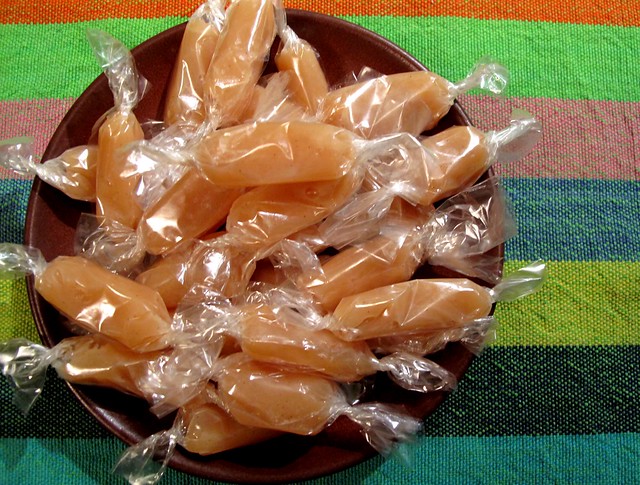
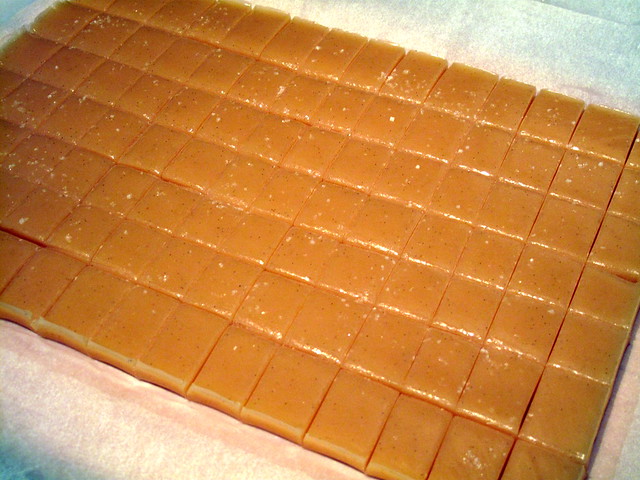
Vanilla Bean Fleur de Sel Caramels {A Recipe}

Fleur de Sel Vanilla Bean Caramels
I cannot tell you how long I've been meaning to do this. Four, maybe five years?   Since I decided to scale back on my baking this year, I finally had time to try homemade caramels again.  I attempted these once several years ago - but I overcooked the caramel and ended up with a hardened mass once it had cooled.  This time I might have been a little overly cautious - these are an eensy bit soft and could be just a smidge darker, but they are still dangerously delicious. As it turns out - as long as you don't burn the sugar, and don't cook the caramel to the point you can't chew it, there is a pretty good-sized range wherein success can be achieved here.  I know this recipe will scare some of you - it scared me for the longest time, but honestly, the hardest part has been keeping my hands off of them long enough to get them to their recipients.
Vanilla Bean Fleur de Sel Caramels
There are a few things you will need before you start.  An accurate digital thermometer and cellophane or wax paper caramel wrappers are essential.  You also need a large heavy pot and a wooden spoon, and one more thing - patience.  The sugar can take a long time to turn the right shade of brown, and if you turn up the heat too high to get it moving, it can burn.  If you overcook it, it will turn inedibly bitter - you'll know it's gone too far if it turns the slightest bit reddish.  The good news is it's pretty hard to overcook the sugar in this recipe because it's tempered with some water and corn syrup. This helps it cook more evenly, and prevents crystallization.  (If you object to corn syrup you can use brown rice syrup or Lyles Golden Syrup - they will  serve the same purpose.)  When you add the hot cream to the sugar mixture, it will take a few minutes to come to temperature, but when it starts moving, it will move fast - so definitely keep an eye on the thermometer as you stir.  This recipe makes a lot, but certainly not a ton.  I'm having absolutely no trouble giving them all away - and if I had the time, I'd make another batch!
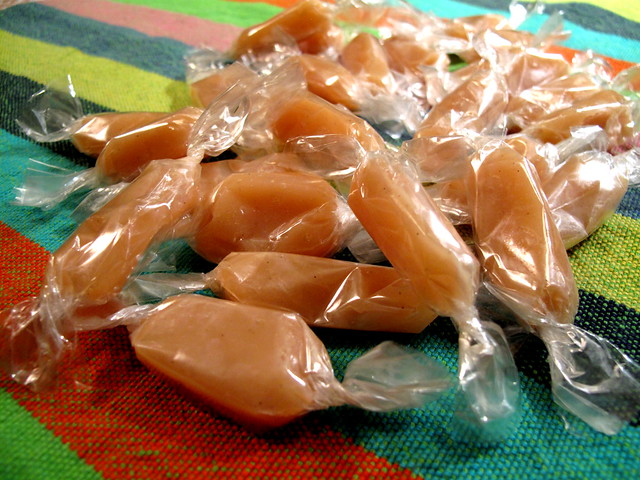
Vanilla Bean Fleur de Sel Caramels
Vanilla Bean Fleur de Sel Caramels (Edited 12.19.11)
adapted from the Barefoot Contessa

Ingredients:
3 cups sugar
1/3 cup light corn syrup
1/3 cup water
2 cups heavy cream
1 1/2 sticks good quality unsalted butter
1 heaping teaspoon Maldon or other good quality sea salt, plus fine fleur de sel for sprinkling.  (I used Fleur de Sel de Guerande)
1 teaspoon vanilla extract or half a vanilla bean (note they are added at different stages of the recipe)  .
neutral vegetable oil

special materials: candy or caramel wrappers , a probe thermometer, a large, heavy pot, parchment paper.

Method:
Line a 9x17 inch baking pan with parchment paper and very lightly coat the paper with vegetable oil or butter.

In a large, heavy pot with high sides (a stock pot is good for this), cook sugar, corn syrup and water over medium/high heat until the mixture turns a deep golden brown.  Do not stir, just swirl the pot and tip it to see the color. 

In the meantime, melt the butter in a small saucepan and add the cream, the seeds of half a vanilla bean (if using)  and 2 tsp. sea salt.  Bring just to a simmer.

When the sugar is cooked to the desired degree of doneness (based on the color) pour the cream mixture  into the pot.  The mixture will bubble up and steam vigorously.  Cook, stirring continuously with a wooden spoon, until the mixture registers 245 on a candy thermometer.  Stir in the vanilla extract (if using) and generous teaspoon of salt.

Immediately pour the hot caramel into your parchment lined pan.  Sprinkle evenly with the fine fleur de sel, and allow to cool until set.   (It can also be refrigerated - coat it with lightly oiled saran wrap to prevent it from getting sticky.)

When the caramel has set, score and cut it into little pieces just a little bit larger than 1 inch square (don't worry about making them perfect - they'll squish in the wrappers)  and wrap them in cellophane or wax paper squares.  twisting the ends closed.  (If you have a friend or two to help with this, it could be a great little coffee-klatsch activity.) 

Store them in the fridge to extend their longevity - then give them as gifts and wow your friends with your homemade candy prowess!   

p.s. - I also made Peppermint Bark.  This recipe is the best on the planet.  The contrast of the harder white chocolate against the slightly soft ganache filling is delightful.   I use Peppermint Oil instead of extract (just because that is what I had) one drop in the white chocolate and 2 in the dark (per batch).  I always at least double the recipe and recommend you do too - it disappears fast!

*EDIT* I've made these a few times since this post was written, and I have made a few edits to the recipe based on my experience.  For one thing, I recommended vanilla paste for an addition - but I think vanilla extract and vanilla bean are more common and easier to use, so I've modified the recipe to use those.  I also recommend cooking the sugar to a darker color, and adding a little less salt to the caramel mixture, since they will also be sprinkled with salt.

Friday, November 26, 2010

The First Thanksgiving

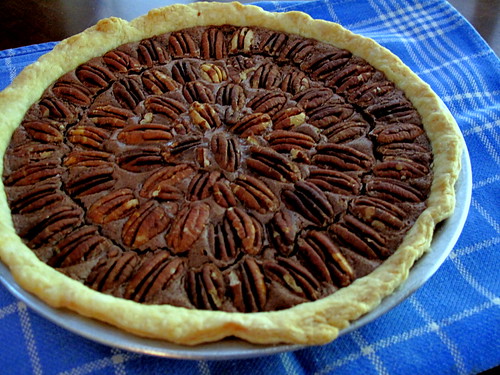
Chocolate Pecan Pie
They say to always put your best foot forward, so I'm leading with this picture of the chocolate pecan pie I made the other day. I find it hard to juggle a camera and every dish/spatula/pot/pan in my kitchen at the same time, so I don't have very many good photos of the big feast. Ultimately, for my first time hosting, I think it all went off ok. (*whew!*)
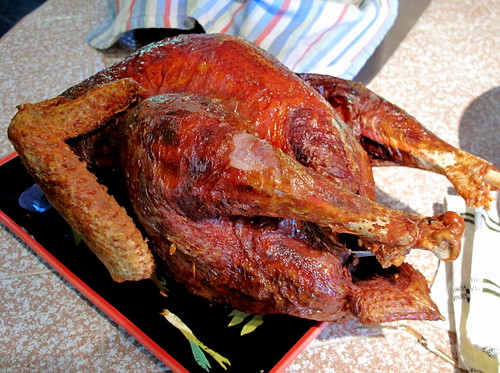
Fried Womach Turkey
There are a few things I might do differently next time, but I have NO regrets about frying two of our three turkeys (or cooking three turkeys, for that matter.) They came out fantastic - especially the Womach Ranch bird, above. The skin was crisp, the meat was moist, it was quick, you can easily do more than one - I think we have a new family tradition. (I did the other one in an electric roaster, and it came out great too.)
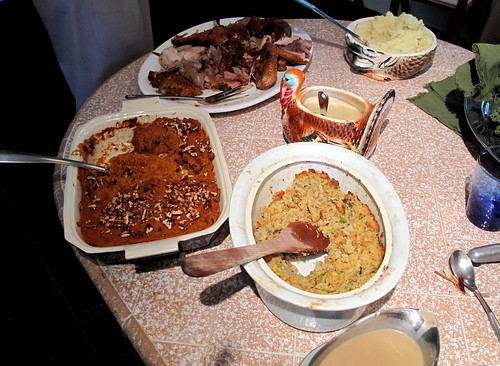
'Thanksgiving
The rest of the meal was traditional as well. I made our family dressing with sage, buttermilk biscuits and cornbread, sweet potato casserole, brussel sprouts, cranberries and gravy. I made homemade dinner rolls, but the first batch of dough didn't rise, and the second didn't rise in time to be baked with the meal, so we had to run out to get some. Next time I'll make those earlier. I'll also start the gravy earlier, so it can develop more flavor, hash the brussel sprouts, so they'll cook faster, and make the sweet potatoes a little lighter and fluffier. I'd also like to try a different dressing recipe - maybe sourdough with oysters or sausage - something a little more savory.
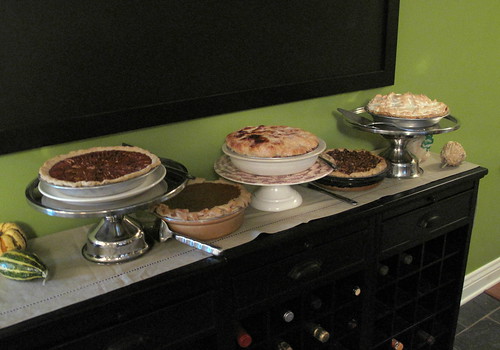
Thanksgiving Pies
I wouldn't change a thing though, about the last part of the meal. The pies. I made two this year, a chocolate pecan and a lemon meringue, and Connie made four - two pumpkin and two apple cranberry - one of each with walnuts & one without. (I guess there is one thing I'd change, I'd have her make them all with nuts!) There was also a spice cake - made by Eleanor and Elizabeth - which meant we had seven desserts for eleven guests. I ate all I could last night and more for breakfast this morning, with fresh whipped cream and coffee. I'm giving away most of the rest. That kind of goodness must be shared - both for my benefit and theirs!

I hope everyone had a wonderful holiday, and hope you enjoy a peaceful and bright long weekend!

Monday, September 27, 2010

Killer Granola

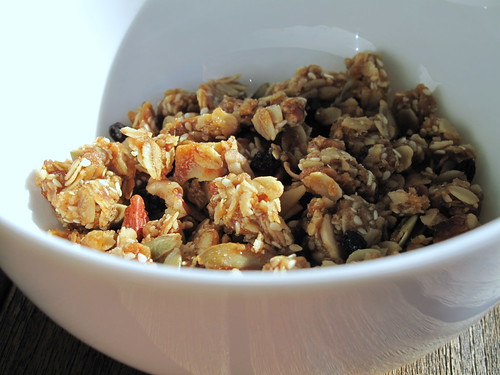
The Best Homemade Granola Ever

Are there any granola recipe contests going on out there? Because if so, I want to enter this one. To be fair though, I'd have to give most of the credit to Jeff Jackson at A.R. Valentien, since this is pretty heavily based on his recipe for "Jackson Granola" served at the Lodge at Torrey Pines (I hear they do a mean breakfast, and I wouldn't doubt it.) It's also similar to Alice Waters' Cafe Fanny granola in that it has the sesame seeds, which, as far as I can tell, are otherwise kind of an unusual ingredient in granola.

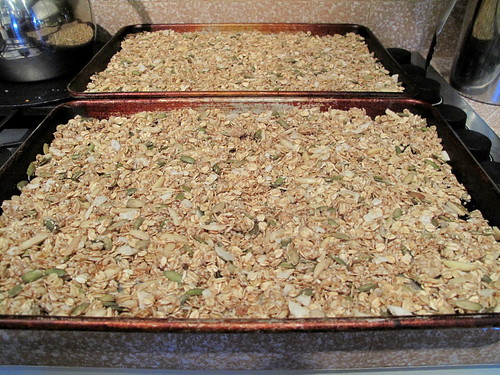
Chef Jackson's recipe is by weight, which is kind of fun because all you have to do is put a bowl on a scale and keep adding the ingredients, zeroing it out every time - but I always have a hard time measuring the olive oil and honey, since the scale can't keep up as it pours in. More than once I've had to add more dry ingredients to soak up the excess liquid - which isn't really a problem, just a little inconvenient. After a couple of experimental batches that were good but not quite perfect, I came up with this recipe with all of the ingredients measured by volume. I absolutely cannot stop eating the results, which must mean we have a winner. Here it's ready for the oven...
IMG_0256

I don't believe in adding any cinnamon or other seasonings - it doesn't even have salt. It gets all the flavor it needs from the sesame seeds, nuts, coconut and honey. If you can't find unsweetened coconut, don't substitute the regular variety - it will be too sweet. I really like the Bob's Red Mill brand - it's wide and thin and bakes up nice and crisp.

This is a great "whole food" snack or breakfast - very nutritious and a great source of energy if you're planning on running a marathon, or say, if you're a growing teenager, but it's not diet food, that's for sure. I like to eat it for breakfast sprinkled over some Siggi's Passionfruit Pomegranate Skyr yogurt. Luckily, a little goes a long way!
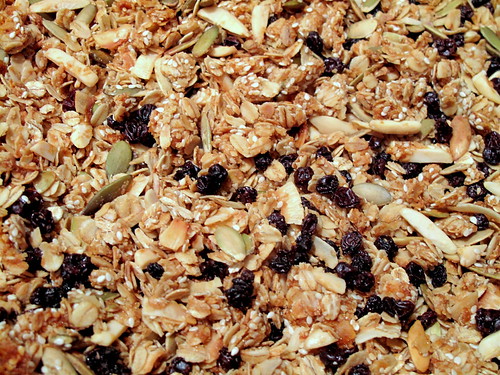
IMG_0263

Killer Granola
Inspired by Jeff Jackson's "Jackson Granola" for A.R. Valentien at the Torrey Pines Lodge

5 cups rolled oats
1/2 cup oat bran
1/2 cup sesame seeds
1 cup whole or slivered raw almonds
1 cup raw unsalted pepitas
1 cup flaked unsweetened coconut (such as Bob's Red Mill)
1/2 cup flour
1/3 cup brown sugar

2/3 cup honey
1/2 cup olive oil

1 cup dried currants or raisins*

Set the oven to 225 degrees

Stir together the dry ingredients, up to the honey and olive oil. Pour the honey and olive oil over the mixture and combine with your hands (rub a little olive oil on them to prevent sticking) or a wooden spoon until the honey and olive oil are evenly distributed. (If you like a lot of clumps, add a little more honey and olive oil, proportionately.)

Spread evenly over two half sheet pans. Bake at 225 degrees for 90 minutes. Stir the mixture on the pans and sprinkle them evenly with currants/raisins. Bake for an additional 30 mins. (You don't want it to brown very much - if it looks like it's starting to, take it out.) Granola will crisp as it cools. Cool completely on the pans and store in an airtight container.

*You can also add the dried fruit after it's baked, and you can add other dried fruits like apricot, pineapple, etc. if you want - I just like the way the currants get a little chewy after baking.)