Showing posts with label desserts. Show all posts

Tuesday, January 03, 2012

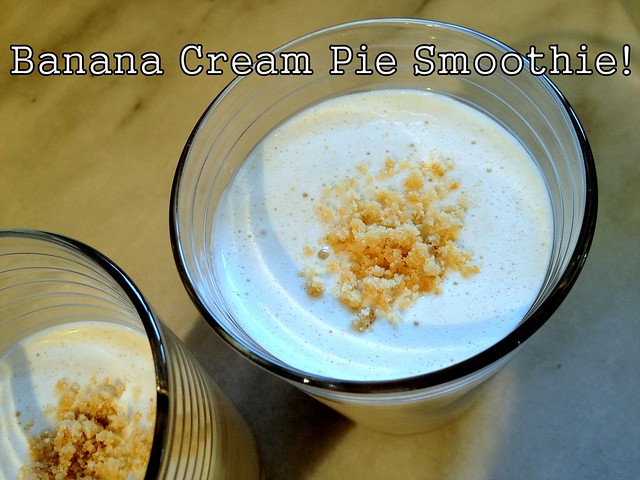
Banana Cream Pie Smoothie
The other day I was fighting a craving for a milkshake when I came up with this slightly healthier alternative.  It's just nutritious enough to be something more than a dessert,  but super creamy and rich with all the flavors of banana cream pie. It's amazing how much difference that one tablespoon of cream makes!  If you don't already keep frozen bananas on hand for smoothies or baking, just take ripe bananas and break them in thirds, and freeze in a ziploc bag.  If you're feeling extra indulgent, whip in a teaspoon of peanut butter too.  It will make the transition from the debauchery of the holidays to new year's resolutions that much easier!
Banana Cream Pie Smoothie
Banana Cream Pie "Smoothie"

3 oz frozen banana (75 cals)
1 scoop vanilla whey protein powder (100 cals)
1 teaspoon granulated sugar  (10 cals)
1 Tablespoon heavy whipping cream (50 cals)
1/2 cup nonfat/skim milk (45 cals) (you could also approximate the skim milk/cream blend with a blend of whatever you have on hand - lowfat, half and half, etc. )
1/4 teaspoon vanilla extract
1/2 shortbread cookie or graham cracker (check package for cals). 

Fold a paper towel over the shortbread cookie or graham cracker and crush with the heel of your hand.  Use the paper to dump the crumbs into a small bowl.

Place the frozen banana, scoop of protein powder, sugar, whipping cream, vanilla extract and milk in a blender or cup for a hand blender.  Blend until smooth and creamy.  Add about 1 teaspoon of the crumbs and pulse lightly just to stir them in.  Pour the smoothie into a glass and sprinkle some crumbs on top.  Drink with a straw. 


makes 1 serving = 280 cals (plus crumbs.) 
(one serving is the amount pictured, divided into two glasses.) 

Wednesday, July 06, 2011

Frozen Chocolate Peanut Dacquoise

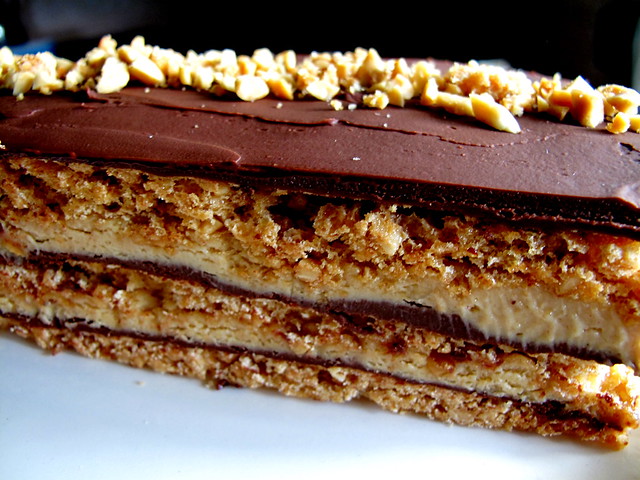
Frozen Chocolate Peanut Dacquoise
I made this for a 4th of July party the other day, and it was such a hit (if I do say so myself!) I figured I'd better write down the recipe and share it before I forget what I did.  I found the original version of this on Bon Appetit's website - I love desserts made with meringue layers, and I love the idea of putting peanut butter into a fancy sounding concoction like a dacquoise, which is usually hazelnut meringues layered with buttercream or whipped cream.

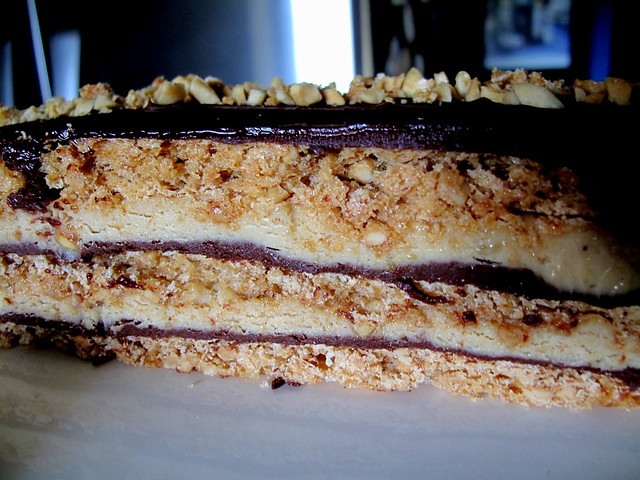
The main differences between my version and the original are that I froze it and I added more peanut butter to the mousse layers.  I also changed a few things about the method and order of steps in the recipe.  Don't let the layers scare you away - this really is not difficult at all.  The finished dessert is cold, creamy, crunchy, smooth, salty and sweet  - with the peanut mousse accented by crisp/chewy layers of meringue and velvety ganache.  It's a little like a Vienetta, that layered frozen ice cream cake that's only available in Europe now, but about 10 times better. Definitely something to make when you have people to share it with, lest you eat it all yourself.  (If you're anything like me, anyway.)  This recipe makes two desserts - each one serving about 8-10 people.   That is a lot, but given how popular as it was and how long it keeps in the freezer, I don't think you'll have to worry about getting rid of it.
Chocolate Peanut Dacquoise
Frozen Chocolate Peanut Dacquoise
adapted from Bon Appetit

Ingredients:
meringue layers
2.5 cups salted peanuts  (I used Trader Joes crunchy peanuts - the original recipe suggested skin on Spanish peanuts.  I'd use anything but dry roasted.)
1.5 cups of sugar, divided into 1/2 cup and 1 cup
10 large egg whites at room temperature
1 tsp vanilla extract

mousse
1.5 cups salted chunky natural-style peanut butter
.5 cup (packed) golden brown sugar
2 cups well-chilled heavy whipping cream, divided
sea salt

glaze
.25 cup natural unsweetened cocoa powder
.25 cup sugar
1 cup heavy whipping cream
1 1/3 cups bittersweet chocolate chips
Pinch of fleur de sel or sea salt

Preparation:
1) Make the chocolate ganache glaze:
Whisk cocoa powder and sugar in medium saucepan. Gradually add 1/4 cup water, whisking until smooth. Whisk in heavy cream. Bring to boil (or near boil) over medium heat, whisking frequently. Reduce heat to low. Add chocolate and whisk until melted and smooth.  Stir in the pinch of salt.  Let stand at room temperature until cool and slightly thickened, stirring occasionally, about 2 hours

2)  Make the mousse:
Using an electric mixer with the whisk attachment, beat 1 cup of whipping cream until stiff peaks form.  Remove to a large shallow bowl and chill.  Put peanut butter and brown sugar in the mixer (using the whisk attachment) and  blend until smooth.  With mixer running, gradually beat in 1/2 cup cream. Add another 1/2 cup cream and beat just to blend.  The mixture should be smooth and runny.   Fold peanut butter mixture into whipped cream  in 3 additions. When the mixture is almost blended, taste it and fold in some finely ground sea salt to taste - it will depend on how salty your peanut butter is.  Chill until ready to use.

3)  Make the meringue layers:
Preheat oven to 275°F.  Line large baking sheet with parchment paper, or if you have them, use Silpats to prevent sticking.

Grind the nuts with 1/2 cup sugar in processor until the mixture looks like coarse breadcrumbs.  Line two half sheet size jelly roll pans with parchment or Silpats.

Using electric mixer with the whisk attachment, beat egg whites until foamy. With mixer running, gradually add remaining cup of sugar, beating until meringue is stiff and glossy but not dry.  Add ground nut mixture and fold gently just to blend.  Immediately spoon meringue onto parchment or silpats and spread to form 3 uniform rectangles  in a row on each pan about half an inch thick, using about 2 cups meringue per rectangle.

Immediately bake meringues until light golden brown all over and dry to the touch, about 1 hour 20 minutes. Transfer to rack and allow to cool slightly - if using parchment, remove the parchment while the meringues are still slightly warm and then allow to cool completely.

To assemble:
Line a flat plate or serving platter with a piece of wax paper or parchment and set one meringue on top. Spoon glaze evenly over the top of the meringue and spread by pushing to the edges using a small offset spatula.  Top with a layer of mousse about 1/3 inch thick.  Set another meringue on top and continue to layer until you have three layers of all 3 components - ending with ganache.  (If at any point during this process your mousse or glaze become runny - just refrigerate everything until they firm up again.)   While glaze is still soft, top with a line of chopped peanuts running down the center.  If you have leftover glaze, save it.

Place the desserts in the refrigerator 6-8 hours or overnight.  During this time the meringue will soften a bit.   Use a sharp heavy knife to trim rough edges of entire dessert to form a perfect rectangle.  Clean the knife as needed with hot water to keep the edges neat. I think it's pretty with the sides exposed to show the layers, but if you want to, you can also re-warm the leftover glaze and use an offset spatula to spread it over the sides after you trim it.

Using a spatula, transfer dessert from parchment paper to a serving plate or platter. (If you have some leftover ganache handy, you can use a dollop to anchor it to the plate.)  Freeze uncovered for half an hour to an hour.  Once the outside of the dessert has hardened, wrap it well in plastic wrap, and return it to the freezer until ready to serve.  To serve, slice into portions while still frozen.


Thursday, June 16, 2011

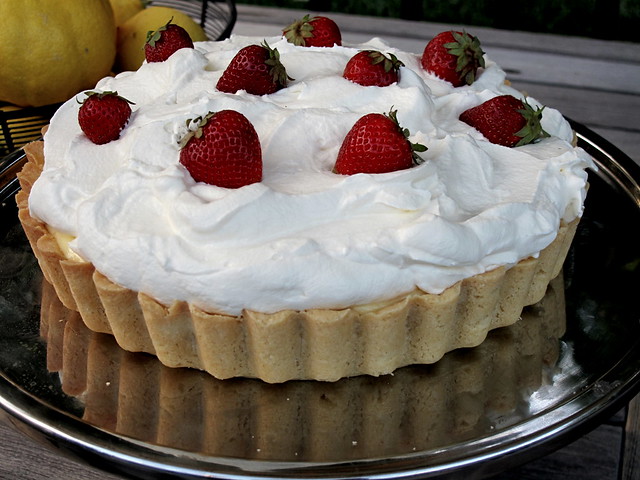
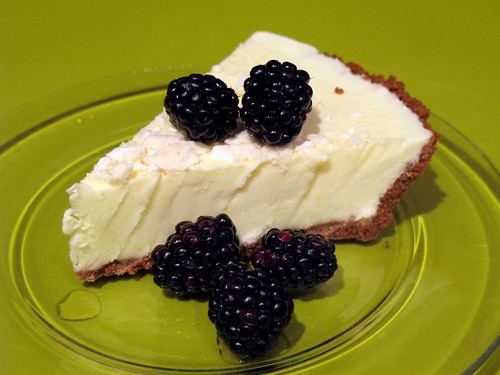
Lemon Cream Pie {A Recipe}

Lemon Cream Pie
You may have noticed, there hasn't been a whole lotta baking going on over here at Casa Q. Foodie lately. We've been watching our girlish figures and trying to eat more healthfully overall - so at the very least, whenever I do get the itch, I make sure I have a plan for the results that doesn't involve us eating the whole thing ourselves.

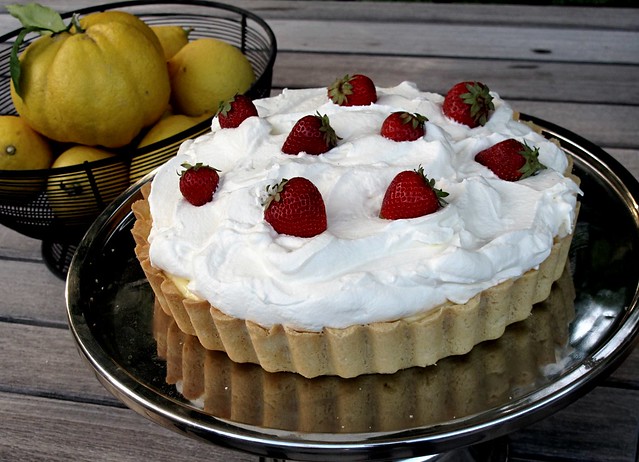
One such opportunity presented itself a few weeks ago when our good friend Tommy was visiting from San Francisco with his lovely girlfriend Liz. We threw them a little dinner party with some other mutual friends. The menu included Aperol cocktails, honey and thyme glazed ribs, a fava bean, cucumber and herb salad, and for dessert, this lemon cream tart - which was so thick and so deep, I'm just going to call it a pie.

For the crust, I used some butter cookie dough I had made a few weeks ago and blind baked it in a fluted quiche pan because I wanted it to be deep enough to accommodate whole strawberries standing on end. The filling was Tartine's recipe for "lemon cream" - which they put in small tart shells at the bakery. It's creamy, rich and slightly tart -  unless you're the one who makes it you'd never guess how much butter is in it. And cream. Especially once you whip a whole pint and pile it on top...

Just try not to think about it. Or do.  Whatever you think is best. :)
Lemon Cream Pie
Lemon Cream Pie with Strawberries
adapted from the Tartine Cookbook

For the crust:
(You will only need about a third of the recipe, but the rest freezes well.)
4 sticks (1 pound) fresh, best quality unsalted butter, softened. (I like Plugra and Straus.)
1 1/3 cups sugar
3/4 teaspoon salt
3 large egg yolks
2 teaspoons vanilla extract - or vanilla paste, if you like flecks.
4 2/3 cups all-purpose flour

Beat butter, sugar and salt together in a standing mixture with the paddle attachment. Blend in the egg yolks, one at a time, and then the vanilla. With the mixer on low speed, add the flour gradually, mixing just until combined. Divide dough into thirds. If you want to bake right away, just press and flatten chunks of the soft dough into a 9 inch quiche pan or regular pie pan until the bottom and sides are evenly covered. Pat cookie dough to be used later into a 1.5 inch thick round and refrigerate. (To bake, roll out or slice and bake at 375 for 5-10 mins depending on size. Also makes great thumbprint cookies.)

Chill the shell thoroughly before baking - you can even pop it in the freezer if you're in a hurry. You want it nice and cold when it goes into the oven. When you're ready to bake, preheat the oven to 375, and line the shell with parchment and pie weights or beans. Blind bake the shell at 375 for about 15 minutes with the weights in. Take them out, and bake about 5 minutes more, until it's nice and golden brown. If you're using a fluted shell, when you take the weights out - use the round handle of a wooden spoon or a pen to press the dough against the sides of the pan all the way around. Allow to cool completely before filling.

For the filling:
1/2 cup plus 2 T. lemon juice
3 large eggs
3/4 cup sugar
pinch of salt
1 cup unsalted butter, cool, cut into tablespoon sized slices or cubes

1 pound of medium to large sized strawberries

Heat about 1.5 inches of water to a simmer in a double boiler, or a saucepan that is the right size for a non-reactive metal bowl to fit into so that the bowl doesn't touch the water but sits just above it. In the bowl, combine the lemon juice, whole eggs, egg yolk, sugar and salt. (Add the egg yolks last and whisk immediately - if you let the egg yolks and sugar sit, they will become grainy.) Rest the bowl on the pan and whisk until the mixture becomes thick and registers 180 degrees on a thermometer, this will take about 10 minutes. Remove the bowl from the water and let the mixture cool to about 140, stirring occasionally.

When the mixture has cooled to 140, strain it with a fine mesh sieve, and use a hand blender in a high sided bowl or bar blender to blend in the butter one chunk at a time, blending continuously, and allowing each chunk to become incorporated before adding the next. It will be pale yellow and very thick. At this point you can add a little lemon zest or up to a tablespoon or so of lemon juice if needed to brighten the flavor. (I did, but I used Meyer lemons, which are a little more mild than Eureka.) Chill the cream until your tart shell is cool, or if it is, go ahead and fill it.

To assemble the tart (which you should do no more than a few hours before you plan to serve it) cut the tops off of the strawberries and dot the tart shell with them flat side down, points up, about a quarter inch apart. Pour the lemon cream over the top and chill for at least an hour.

To unmold the chilled tart from it's pan, turn a stove burner on, and quickly but carefully turn it over the flame to warm the outside of the tart pan all the way around, using a dish towel to protect your hands. Place your hand on the bottom and gently pry the ring down off the tart. Use a long thin knife to slide the tart off of the bottom of the pan and onto a platter or plate.

For the topping:
2 cups of cream
2 Tablespoons of powdered sugar

Beat cream in a standing mixer with the whisk attachment on high until soft peaks start to form. Add powdered sugar and continue to beat until stiff.

Dollop the top of the tart with the whipped cream, spreading to the edges with an offset spatula, and dot the top with smaller whole strawberries. Refrigerate until ready to serve.

Monday, January 31, 2011

Momofuku Milk Bar NYC & Compost Cookie Recipe

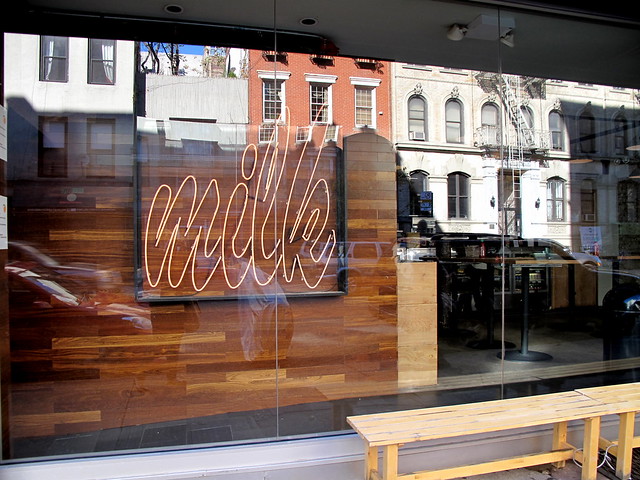
Momofuku Milk Bar - Downtown
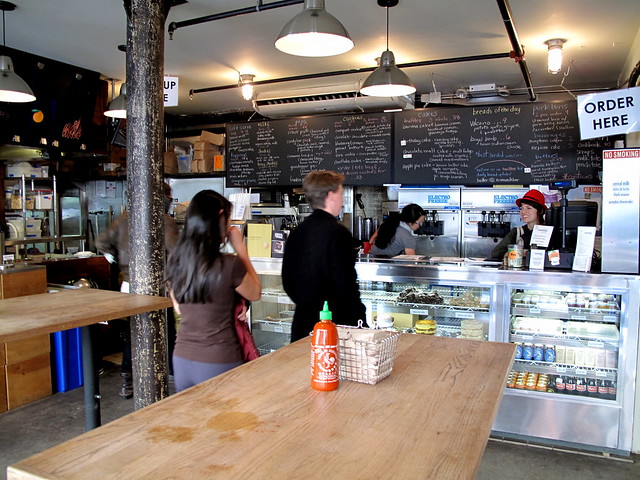
Can we pretend it's last Friday? Because that's when this was supposed to be posted. A last New York post to go along with Wednesday's list of comparable delights in San Diego. I can confidently say there is nothing comparable to Momofuku or the Milk Bar in San Diego, but that's why we travel, no? The good news is that even if you can't visit the Momofuku family in NYC, David Chang is generous with his recipes and the intrepid cook can recreate many of his dishes at home. His cookbook is not quick or easy, but it's a good read nonetheless.
Momofuku Milk Bar - Downtown
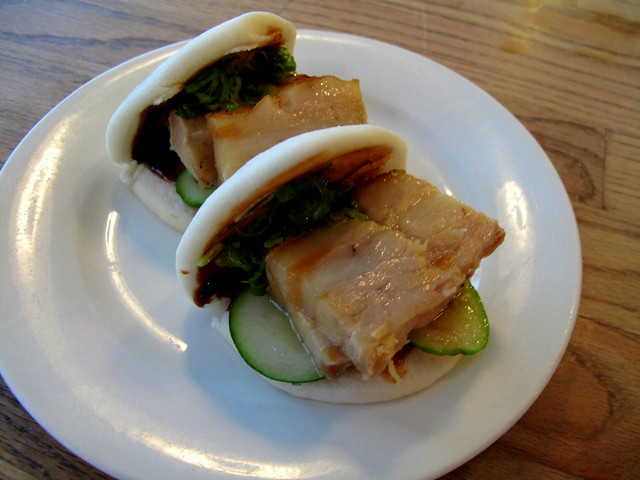
I myself have baked several batches of the famous "Compost Cookies" - so named because they're full of odds and ends including coffee grounds, potato chips and candy. The crack pie recipe is also floating around out there, here in fact. (Note that these recipes are not in the Momofuku cookbook - pastry chef Christina Tosi is working on her own book, due out soon recently released her own cookbook.) If you're feeling incredibly ambitious though, you could try the recipe for the pork buns. These consist of a meltingly (literally, it turns to liquid in your mouth) tender piece of pork belly, layered over fresh cucumber pickles, hoisin sauce and scallion greens on a sweet bun. I took this photo before I drizzled them with Sriracha, but that little bit of sweetness and heat balancing out the incredible richness of the pork in these buns is one of the best single mouthfuls of food I've experienced in recent memory. (To get the full effect, I recommend washing them down with a chilled can of Porkslap beer, available at the counter.)
Pork Buns at Momofuku Milk Bar
The photos above were taken at the Second Avenue Milk Bar - the original location next to Momofuku Ssam Bar. The uptown location I mentioned earlier does not offer the pork buns or beer - but focuses solely on the sweets. Both offer at least two flavors of the famous soft serves including unusual seasonal flavors like plum, lemon verbena, french toast, donut, cereal milk, carrot cake, red velvet, etc. I tried the dulce de leche at the East Village location - it had a wonderful velvety texture and tasted just like salted caramel.
IMG_1211
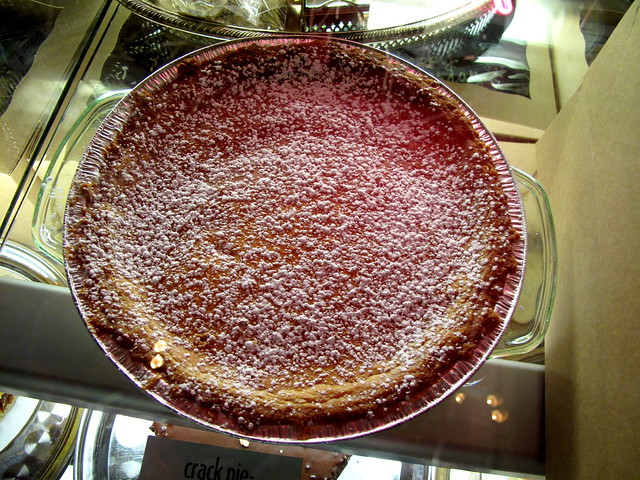
The Crack Pie - a thin, superrich layer of sugar and butter baked over an oatmeal crust - is available at both locations both as a whole pie and packaged individual slices. I bought several of the boxed slices to take home and distribute as gifts. I also bought a few slices of their grasshopper and candy bar pies, but found them disappointing. I didn't try the cakes since they are sold whole - but their "cake truffles" made from scraps are sold three to a package - I especially liked the malted chocolate. Overall, I liked the concept and the adventurous spirit of the place as much or more than some of the offerings.
Momofuku Ssam Bar wall
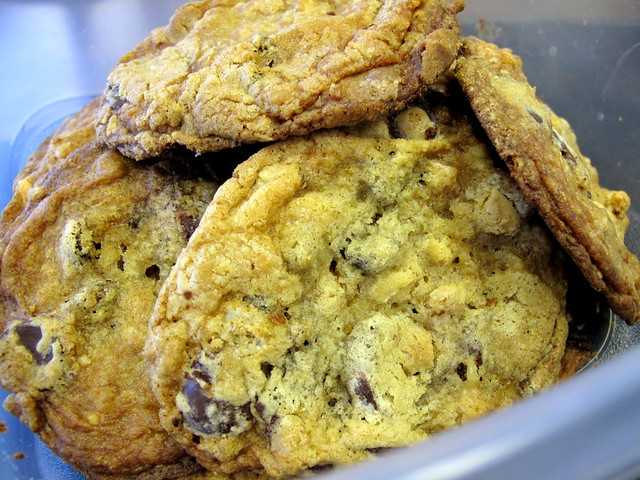
Since my visit to the East Village shop was on the day I flew home, I picked up a few of the savory creations - a reuben croissant stuffed with corned beef, cabbage and swiss cheese, and another stuffed with kim chi and bleu cheese - and took them home (I packed them in the thermal bag with my smoked salmon from Russ and Daughters.) We had them for dinner the next night - warmed to melt the cheese - alongside a salad, and I was glad I'd gone to the trouble to schlep them home. Ironically though, I discovered I like the Compost Cookies that I make at home better than the ones from the bakery. I use the recipe below, which I adapted from the one on Adam's blog The Amateur Gourmet.  Enjoy!
Compost Cookies
Momofuku Milk Bar Compost Cookies
adapted from Christina Tosi's recipe as it appeared on Regis & Kelly's website and The Amateur Gourmet

Ingredients:
1 cup butter (two sticks) unsalted, soft at room temperature.
1 cup granulated sugar
3/4 cup light brown sugar
1 tsp vanilla extract
2 large eggs at room temperature
2 cups all purpose flour
2 tsps baking powder
1 tsp baking soda
2 tsps Kosher salt
1 cup chocolate chips
2 cups of sweet baking ingredients - such as chocolate chips, butterscotch chips, heath toffee chips, peanut butter chips, chopped candy, etc. (after much experimenting, my favorite combo is 1 cup dark chocolate chips and 1/2 cup each of heath chips and chopped peanut butter cups or peanut butter chips)
1.5 cups coarsely chopped salty snack foods, such as pretzels, potato chips, crisp rice cereal, etc.

1. Place the butter, sugar and salt in a stand mixer with the paddle attachment. Beat on high for two to three minutes until well blended, scraping the bowl down as needed. While this is happening, stir together the baking powder, baking soda and flour.

2. Lower the speed and add the eggs and vanilla to the butter mixture, beating to combine. Then set a timer for ten minutes and turn the mixer up to medium-high speed. Do your nails, wash the dishes, whatever you want. During this time the mixture will lighten significantly in color and double in volume and the sugar will dissolve completely. (Do NOT skimp on the time, even if it looks like this has already happened. Trust me.)

3. When the timer goes off, lower the speed and gradually add the flour mixture. Stir by hand or blend on low speed just until no traces of flour remain, about 20 seconds.

4. Stir in your chopped candy and snack foods and stir in by hand or blend a couple of spins on low speed - just long to distribute them through the dough.

5. Chill the dough for at least one hour in the refrigerator or freezer before baking. (To speed this process, you can scoop the dough onto a parchment lined cookie sheet and place the sheets in the freezer or fridge until well chilled.)

6. To bake, preheat the oven to 375 degrees. Scoop 1.5 inch balls of chilled dough onto a cookie sheet lined with parchment (I think it works better than Silpats for these cookies) and bake for about 9-12 minutes. They will crackle and puff in the middle. Take them out just when they no longer look raw in the middle and the edges are nice and brown. They will flatten and continue to brown outside the oven. (You may have to experiment with the first batch, if they are browning too fast, turn the oven down to 350 and bake a bit longer.)

7. Try not to eat the entire batch in one sitting!


Wednesday, January 12, 2011

Sprinkles!

Sprinkles Cupcakes
Did you know that Sprinkles is coming to San Diego?  Actually La Jolla, to be exact. The new store opens this Thursday, January 13, 2011 in the Whole Foods shopping center formally known as "The Shops at La Jolla Village" - off the 5 Freeway at Nobel Drive, close to UCSD.

If you're planning a visit, this chart tells you which flavors they have on what days. After pretty extensive sampling of their cupcakes up in Orange County, I can say that I like their Red Velvet, Dark Chocolate, Chocolate Marshmallow (like a Hostess cupcake) and Carrot Cake the best. Some of the other flavors such as vanilla, strawberry and banana can be a little tough and dry on off days. 

There will probably be lines, at least early on - but if you're willing to order at least a dozen, you can order ahead and pick them up.  I may actually swing by there this Sunday with my nieces if the timing works out. I'll say it's a special treat for them, but I'm sure they won't be nearly as excited as I am.

Wednesday, April 01, 2009

My Favorite Chocolate Cake (No Foolin'!)

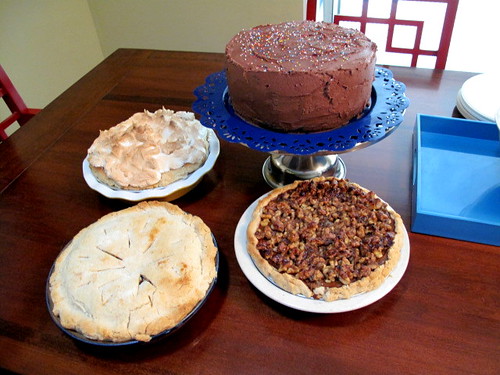
Robertson Family BBQ Desserts

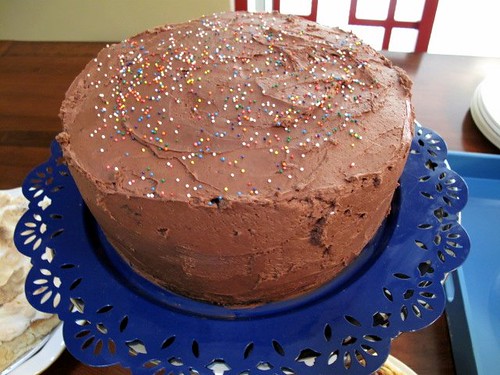
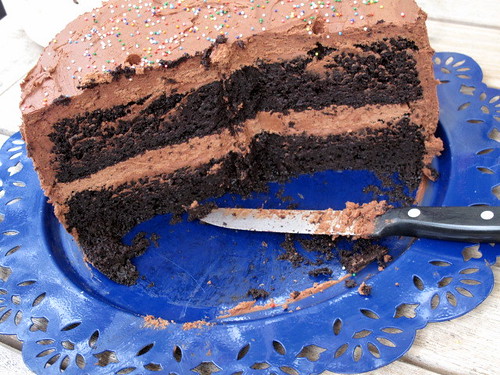
I've tried a lot of chocolate cakes in my time, and baked a few myself, but I knew, the instant I tasted it at Starlite one evening last fall, that this one was The One. It was dark, dense, moist, not too sweet, and absolutely huge - with nice thick layers about one and a half inches tall. I liked it so much that I asked our server for the recipe and wrote my email address on a slip of paper for him to give to the chef. I'd almost forgotten about it when lo and behold - about two months later the recipe appeared in my inbox.

This is pretty rare for me, settling on one recipe I could use for the rest of my life. Aside from my go-to roast chicken I seldom make anything the same way twice. This cake just really does it for me though. Not only is it perfect in terms of its flavor, moistness and size - it's one of the simplest recipes I've seen and very nearly foolproof. It also stores well (I froze mine for a week) and it's so moist that I can't imagine it would ever dry out.
Starlite Chocolate Cake

The only caveat is that the recipe makes a LOT of batter. So much, that at first I didn't believe it would fit into the two cake pans. When it came time to mix the wet and dry ingredients together, I discovered I actually didn't have a big enough bowl, and had to retrieve an enormous one I found at an estate sale, that I had planned to sell in my Etsy store. That bowl is now in my kitchen cabinet, which is where it will stay now that I know I will need it every time I make this cake. If you don't have an enormous bowl, you might try adding half of each of the wet and dry ingredients (by weight) to a third bowl in two batches.

This cake bakes up so tall that you could probably get away with halving the recipe and baking one layer for most occasions. It is nice to know though, that when one of those occasions comes along when nothing but a big, honkin' chocolate cake with thick, fudgy frosting will do - this one's your man.
Starlite Chocolate Cake

Starlite Devils Food Cake
adapted from Sharon La Bate - Pastry Chef at Starlite, and graciously shared by Marguerite Grifka.

Dry Ingredients:
3 cups sugar
2 ¼ cups All Purpose Flour
2 ½ cups cocoa (I used Valrhona)
1 ½ teaspoon baking powder
1 Tablespoon baking soda
1/8 teaspoon salt

Wet Ingredients:
3 eggs
3 yolks
1 ½ cups coffee
1 ½ teaspoons vanilla
6 oz. melted butter (1 1/2 sticks)
1 ½ cups buttermilk

Preheat the oven to 350 degrees.

Line two nine inch cake pans with parchment and grease well (grease the pan before putting the parchment in so it doesn't slip, then grease the paper too.)

Whisk all dry ingredients together in a large bowl. Whisk all of the wet ingredients together well in a separate bowl.

In a very large bowl (a six quart or larger Kitchen Aid should also work) gently fold the dry into the wet ingredients, and whisk gently, just to get rid of any lumps. (If you don't have an enormous bowl but you do have a kitchen scale, you can also weigh out half of each and blend them together in a third bowl, then just pour each batch directly in the cake pans.)

Evenly divide the batter between the two pans, and bake for about 45 minutes, until a toothpick inserted in the center comes out nearly clean (a few moist crumbs are ok) Allow the cakes to cool on a rack for 15-20 minutes, then turn out of the pans, peel the parchment off, and allow to cool completely before storing.

This batter would also make great cupcakes - just fill your papers about 3/4 full, and bake for about 15-20 minutes, until dry and springy to the touch. Take the cupcakes out of the pan as soon as they are cool enough to handle, so that the steam doesn't cause the papers to come off.

Thick Fudgy Frosting
1 pound of powdered sugar
3 sticks of butter, softened
8 ounces of semisweet or bittersweet chocolate, melted
2 Tablesoons cocoa powder
1/3 cup sour cream
1 teaspoon vanilla
dash salt

Whisk cocoa powder and salt into warm melted chocolate until dissolved set aside to cool to warm. Using a stand mixer with the whisk attachment on high speed, beat butter until light and fluffy. Lower the speed and gradually beat in powdered sugar, then sour cream and vanilla, scraping the bowl down as needed.

With the mixer running on low speed, add melted chocolate to mixture and blend, scraping the bowl well to make sure it's all incorporated. Frost the cake immediately. If the mixture gets too thick, you can thin it with a little milk or cream.

Wednesday, April 16, 2008

Frozen Assets and Lemon Pie

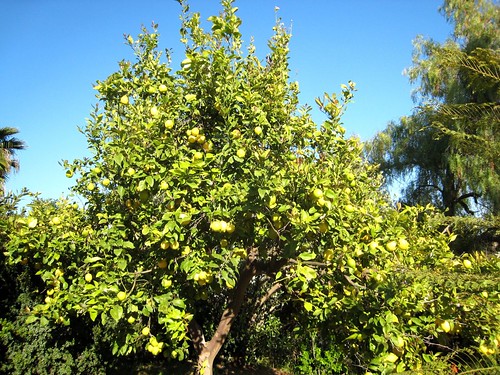
With taxes done and over with, and the possibility of a really great sailing trip coming up in the next couple of months, we're pretty much on financial lockdown around here at Chez Robertson. What that means for you is a lot more posts about cooking at home, and fewer posts about us going out - at least for a little while. Luckily, this situation coincides with the arrival of some of my very favorite ingredients in the markets - fava beans, english peas and strawberries among them - and the arrival of a bumper crop of lemons on our tree.
Our Lemon Tree

One of the branches broke off the tree this week so I suddenly had a bucketful of lemons that needed to be used. I squeezed them all on Saturday, and stashed the pitcherful of juice in the fridge. (James: "Wow, this lemonade is really tart!") The funny thing about most lemon recipes is that they generally don't call for that much lemon juice. Still - with so many around, making something with them just seemed like the right thing to do.

On Saturday we were invited over our friends Jora and Bryan's house for dinner - and I was supposed to bring dessert. It was over 90 degrees - so nobody was doing any baking. I had forgotten to freeze the ice cream maker, which meant no homemade ice cream, so I started researching icebox pies and frozen desserts. Turns out Lemon Icebox Pie is loaded with sweetened condensed milk, and those chiffon pies are loaded with gelatin - neither of which sounded very good to me. Then I remembered a dessert we had at Lucques last summer, a semifreddo with fruit that tasted like frozen whipped cream with candied orange zest and pistachios. Bingo.

There are a lot of different ways to make semifreddo as it turns out - but the defining characteristic seems to be whipped cream either used as a base, or folded into a base - then frozen, usually in a loaf form - often with amaretti cookies or some type of cookie mixed in. I happened to have a container of gingersnaps on hand, and liked the idea of making a frozen pie. I also liked the sound of the recipes that folded meringue into the mixture along with the whipped cream - I thought it might make the mixture less icy, and I think it did.
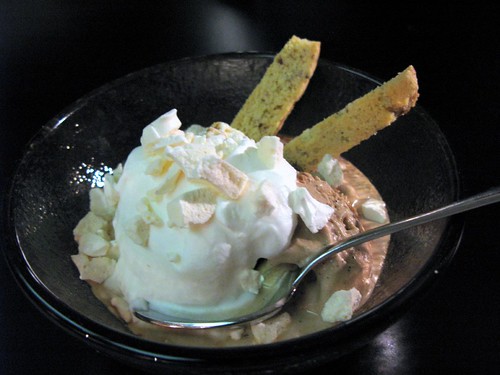
coffee ice cream sundae

By Saturday afternoon, I had the recipe worked out - but no time to make it. So instead, I took ice cream. Jora made a pot of phenomenal Spaghetti con Vongole and afterwards, we made sundaes with Double Rainbow coffee ice cream (the best in existence except perhaps Gelato Vero's) - topped with sweetened espresso, whipped cream and crushed meringues - with biscotti on the side. I also brought vanilla with strawberries and limoncello - in case anyone (besides James) didn't like coffee desserts - 'cause some people are weird like that.

On Sunday, I finally had the chance to make the pie. We had it after dinner on Sunday night, with my copycat version of the Hungry Cat's Pug Burgers. Oh my gah. But we'll get to that in a minute.

I started with a lemon ice cream base from this recipe, cutting down the sugar to accommodate the meringue, and upping the lemon a little to compensate for the dilution with the meringue and whipped cream. (To make this into ice cream - you'd just have to stir in another cup of half and half or cream and put it in the ice cream maker.) I then made a nice sticky marshmallowy meringue with three egg whites and 3/4 of a cup of sugar, and whisked that into the custard (it's too sticky to fold in, truly - and it needs to be incorporated fully) - then, I whipped a cup of cream (no sugar, since the meringue is so sweet) and folded that into the mixture. After I baked my pie shell (in a 10 inch Pyrex pie pan) I put it in the freezer to cool - then poured in the lemon mixture - and away into the freezer it went. I also had some of those Trader Joes meringue cookies still on hand from the sundaes the night before - so I crushed some and sprinkled them over the top before freezing.

The pie froze in about four to five hours - it just has to be completely flat, which is kind of tricky. I was really happy with the fact that it didn't set up rock hard, you can cut it straight from the freezer. The sharp lemon flavor comes through despite the richness of the cream. If I do say so myself, this one's a keeper.
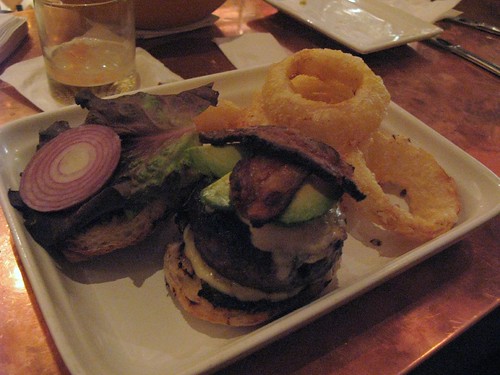
Pug Burger at The Hungry Cat

Then there were the burgers - oh man, the burgers. I haven't tried making these at home since our dinner at the Hungry Cat last summer, but now I don't know if I can ever make another kind of burger again. I was inspired by the blocks of Organic Ground Beef they are now selling at Trader Joes. The blocks are one pound each. Can you guess how many burgers a block made? Anybody?

Two. That tells you all you need to know right there. The good news is this burger requires absolutely no accompaniments. Anything with it would be overkill - no fries, no salad - the restaurant serves it with onion rings and even those are superflous. The meat and its garnishes are so over the top it's all one can rightly absorb by itself.

I divided the beef block into two big thick patties - just over one inch thick and about four inches around and griddled them in a saute pan in a mixture of butter and olive oil until they were just this side of bloody - then put them on toasted focaccia buns with blue cheese, Niman Ranch Bacon, sliced avocado, sliced tomato, red onion and green leaf lettuce. There's something about the combo of the blue cheese, bacon and avocado - and with the rich rare beef and the juices running all over the place? Wow. Just, wow.
Lemon Semifreddo Pie

Lemon Semifreddo Pie in a Gingersnap Crust

For the crust:
3 cups of gingersnaps
2 Tablespoons of butter, melted

For the lemon custard:
2 tablespoons finely chopped fresh lemon zest, divided
1/2 cup fresh lemon juice
3/4 cup sugar
3 large eggs
1 cup half and half

For the meringue:
3 egg whites
3/4 cup sugar

3/4 cup of whipping cream

3-4 storebought meringues, crushed

blackberries, macerated in lemon juice and sugar

For the crust:
Preheat the oven to 275. Put the gingersnaps in a food processor and process into fine crumbs. Add the melted butter and blend together - press into a 10 inch glass pie plate. Bake at 275 for about 15 minutes, until firm.

For the pie:
In a medium non-reactive saucepan, whisk together 1 Tablespoon of the zest, the 1/2 cup of lemon juice, the sugar, and the eggs. Whisk in the half-and-half, and cook the mixture over moderately high heat, whisking constantly, until it coats the back of a wooden spoon and starts to thicken. Strain the custard through a fine sieve into a bowl, pressing hard on the zest. Whisk in the remaining tablespoon of lemon zest and chill the mixture, covered with plastic wrap, until cold (or use an ice bath to chill it down.)

Place the three egg whites in a stand mixer fitted with the whisk, and beat until foamy. Gradually add the 3/4 cup of sugar and beat until the mixture is stiff and glossy. Gently whisk into the cooled custard.

Add the whipping cream to the mixer and beat just past the soft peak stage - it shouldn't be too stiff, but should have plenty of body. Gently fold the whipped cream into the custard mixture.

Pour the custard mixture into the gingersnap crust, and top with crushed meringues. Freeze until firm - about four hours (making sure it's completely level.) Serve with blackberries.

Tuesday, January 16, 2007

The Devil's Food Duel

For a long time now, I've been wanting to make a chocolate cake from scratch. I have a bit of an aversion to baking cakes, pies and other "one piece" desserts, because I can't test them before serving them to friends and family. Sometimes things go well, but then again, sometimes they don't.
foodblog 1461
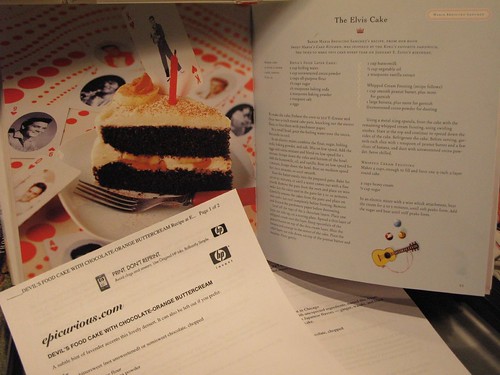
The excuse for this baking frenzy was not this just month's Sugar High Friday #27 (theme: Chocolate by Brand) but a meeting of my monthly supper club. It's supposed to be a Cooking Light supper club, but nobody seems to mind too much if the dessert isn't exactly low fat. After looking online and poring over several of the cookbooks on my shelves, I came up with two radically different recipes, one from a fun little cookbook I picked up last week called "Birthday Cakes" by Kathryn Kleinman, and one from Epicurious. Though they both claimed to make devil's food cakes, the Epicurious recipe used butter, semisweet chocolate and cocoa powder and called for far less baking soda and baking powder. The "cookbook" recipe called for twice as much cocoa powder, double the amount of baking powder and soda, but only half a cup of oil and half as many eggs.

I could hardly believe that two dissimilar formulas would lead to the same result, but I couldn't tell from the recipes exactly what I would get from each one. As you may have already figured out, I decided to try them both. I stuck with the flavors called for in the original recipes, since I figured they would be compatible, but I added a ganache filling to the Epicurious cake, and I used a different frosting recipe from the Birthday Cakes cookbook - the one on the cover to be exact - I really wanted those thick swirls of fudgy buttercream!

"Birthday Cakes" is a cute book with lots of pictures and a wide variety of recipes from the "who's who" of pastry-chefdom, including Maida Heatter, James Beard, Alice Medrich, Alice Waters, Emily Luchetti, Julia Child, Lindsay Shere, Flo Braker and our very own David Lebovitz (who also happens to be the host of this month's Sugar High Friday!) I like that it includes pictures of all of the cakes and gives you a recipe for a finished product, rather than forcing you to guess what will go with what. As a bonus, most recipes include a little story from the chefs as to why the cake is special to them.

On the downside, the recipes aren't quite detailed or specific enough about methods and times - for example, not telling you what attachment to use with the standing mixer, or how long to beat the frosting to get it to thicken properly - but a moderately experienced baker would probably be able to cope with these shortcomings.
foodblog 1460
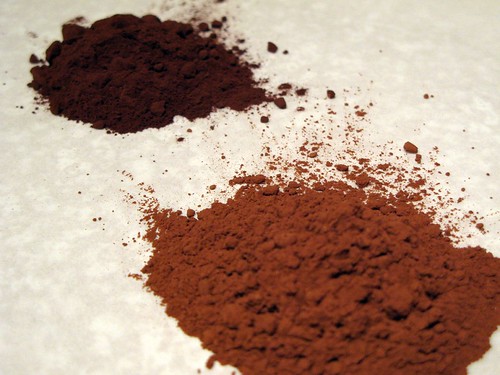
To comply with the Sugar High Friday theme, I must tell you a bit about the brands of chocolate that I used and why. I used two different cocoa powders, Valrhona and Scharffenberger, in an effort to test their properties in finished baked goods. The difference between them in their raw form is strikingly apparent. The Scharffenberger (pictured above in the front) is much lighter and reddish in color, and smells good, like actual chocolate. The Valrhona, which is "dutched" is deep brown and smells a bit bitter. It turns out that the "dutching" process involves washing the cocoa with an alkaline, which raises its' pH level and affects both the flavor and how it behaves when added to baked goods. What I have read online indicates that you are not supposed to substitute one for the other. Apparently it can affect whether the cake rises properly, becasue the cocoa interacts with the baking soda and baking powder. Dutched cocoa will not react with baking soda, and requires that baking powder be added in order for the cake to rise. I used the natural Scharffenberger cocoa in the cake that called for more baking soda and powder, and dutched cocoa in the other cake (along with melted chocolate), which would seem counterintuitive. Both of them rose just fine, but the cooking methods were dissimilar which may account for the difference. One (the Scharffenberger) was dissolved in water first, and the other was simply whisked into the flour.

I was really impressed with the color and flavor of the Scharffenberger cocoa. It wasn't cheap - I found it at Vons for $9.50 for a six ounce can - but it just smells and looks better than ordinary cocoa. To help offset the expense I used Ghirardelli 60% Cacao bars for the semisweet chocolate, which cost 1/4 as much as the comparable amount of Scharffenberger (except in the ganache, where I used Valrhona 55% that I had on hand.) I find that the Ghirardelli 60% chocolate bars and chocolate chips are widely available, always fresh in the store and far less expensive than Scharffenberger or Valrhona.

Ultimately, I found that the cookbook recipe - flavored only with cocoa and containing no butter - produced what I think of as a true devils' food cake. The Epicurious cake had more of a brownie-like flavor and texture. It certainly wasn't bad, but wasn't quite what I was going for. It also had a lighter color and though moist, was a bit crumbly. If I do make this recipe again I would consider using some unsweetened chocolate to deepen the flavor, and I would moisten the layers with simple syrup.

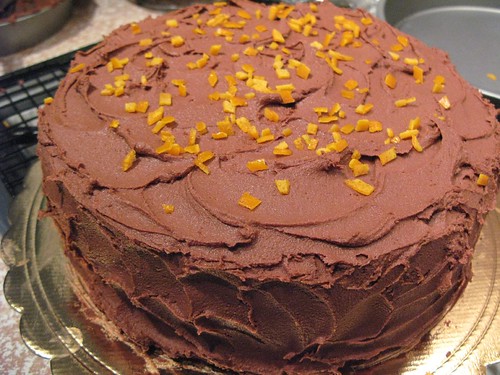
The fillings turned out great. The orange ganache and the fudgy buttercream frosting on the Epicurious cake were spot on - and the whipped cream, banana and peanut butter with the devils' food cake was quick, simple and tasty. They were both popular at the supper club and it was interesting to hear which version people preferred and why. It was about evenly split, with some people preferring the dark moist crumb of the devil's food, and others preferring the dense richness of the Epicurious cake. Either would make a spectacular birthday cake.

Without further ado, here are the recipes:
foodblog 1466
The "Epicurious" Cake:
Chocolate Orange Ganache Torte with Espresso Crunch and Buttercream Frosting

Cake:
(adapted from Epicurious):
4 ounces bittersweet chocolate, chopped (I'd recommend 70% cacao or over)
1 1/2 cups all purpose flour
1/2 cup unsweetened cocoa powder
1 teaspoon baking powder
1/2 teaspoon salt
1/4 teaspoon baking soda
1 cup buttermilk
1 1/2 cups (packed) golden brown sugar
3/4 cup (1 1/2 sticks) unsalted butter, room temperature
4 large eggs

Ganache:
4 oz good quality semisweet chocolate (I used Valrhona Equatoriale 55%)
8 oz heavy whipping cream
1 tbsp Grand Marnier or other orange liquer
1 tbsp brandy
4 drops of orange oil, or 1 tsp of finely grated fresh orange zest

Crushed espresso crunch candy (I bought mine at a baking supply store - you could also just crush some hard coffee candies)

Buttercream Frosting:
(adapted from Emily Luchetti's recipe for Bittersweet Chocolate Frosting appearing in Kathryn Kleiman's "Birthday Cakes")
4 oz bittersweet chocolate (I used Ghirardelli 60%)
8 oz unsweetened chocolate, chopped (I used Scharffenberger)
1 cup unsalted butter at room temperature
3 cups confectioners sugar
pinch of salt
2 tsp vanilla extract
3/4 cup plus 2 tbsp milk

Chopped candied orange peel

For the cakes:
Preheat to 325°F. Butter and flour two 9-inch-diameter cake pans with 1 1/2-inch-high sides. Line bottoms of pans with parchment paper rounds. Stir chocolate in top of double boiler set over simmering water until smooth. Remove from over water. Cool to barely lukewarm.

Sift flour and next 4 ingredients into medium bowl. Using electric mixer, beat brown sugar and butter in large bowl until smooth. Beat in eggs, 1 at a time. Beat in melted chocolate until smooth. Mix in dry ingredients alternately with buttermilk in 3 additions each. Divide batter evenly between prepared pans (if you have one, a scale is great for this).

Bake cakes until tester inserted into centers comes out nearly clean, about 30 minutes. Cool cakes in pans on racks 15 minutes. Turn cakes out onto racks; remove parchment and cool completely.

At this point, Cakes can be refrigerated overnight, well wrapped in plastic.

If desired, you can brush the cakes with a bit of simple syrup before using. It will help keep them fresh longer and make the cake a bit easier to cut and serve. To make, boil equal parts sugar and water (about a half cup of each) and cool - add a bit of liquer or extract for flavor. Flip the cakes upside down and brush liberally with the syrup before filling with ganache.

For the Ganache:
When you are ready to assemble the cake, finely chop the chocolate and place in a heatproof bowl. Bring the cream to a boil in a small saucepan and strain into the chocolate through a wire mesh sieve. Allow to stand for a few seconds and gently whisk by hand to blend. Add the orange oil or zest and liquers and whisk just to blend. Place the ganache in the refrigerator and allow to cool for about forty minutes, stirring once or twice during the chilling (don't allow it to harden).When it is cooled, place it in the bowl of a standing mixer fitted with the whisk attachment, and beat just until thickened and fluffy. Be sure not to overbeat it, or it will become grainy. Do not chill it again before putting it on the cake (like I did, and had to heat it over a double boiler to bring it back to spreadable consistency!)

Immediately spread the ganache over the bottom layer of the cake and sprinkle with the espresso crunch. (I flipped the cakes upside down so that the flat side was facing up.) Add the top layer of the cake and press down firmly - using plastic wrap to keep the cake from sticking to your hands.

For the Frosting:
Melt chocolates and butter together in a double boiler, remove from heat and cool to lukewarm. Sift the confectioners' sugar and salt together into the bowl of a standing mixer fitted with the whisk attachment. In a small bowl, combine the vanilla and milk. Whisk the milk mixture into the confections sugar to form a paste. With the mixer running on low speed, drizzle the melted chocolate and butter mixture into the bowl. Turn the mixer up to medium speed, and whisk at high speed just until thickened to the desired consistency. Do not overbeat the mixture, or it might "break" or start to separate. Use immediately to frost the cake.

To make candied orange peel, boil thin strips of orange peel (the orange part only - remove the pith) in simple syrup (1/2 cup of water and 1/2 of sugar) for thirty to forty five minutes, until most of the bitterness is cooked out. Lay the strips on a paper towel in the refrigerator to cool and dry, then chop finely and sprinkle on the cake.

The finished cake will keep for a day or two unrefrigerated - if refrigerated, bring to room temperature before serving and protect any cut edges from drying out with saran wrap or parchment. Cut the cake with a sharp knife dipped in hot water.
foodblog 1471
The "Cookbook Cake":
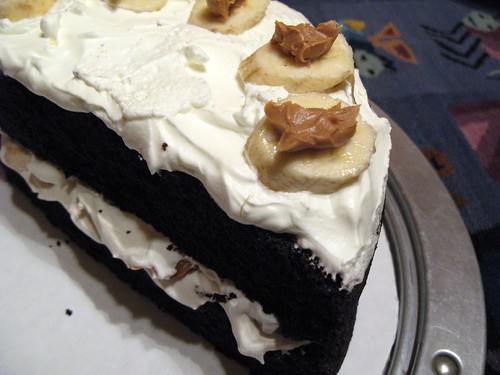
Elvis Cake
Adapted from a recipe by Maria Bruscino Sanchez in Kathryn Kleinman's "Birthday Cakes" in honor of of the King's favorite sandwich - fried peanut butter and banana

(this cake should not be assembled more than a couple of hours before serving because it contains fresh banana and whipped cream - on the plus side, it is really quick and easy to put together.)

Devil's Food Cake:
1 cup boiling water
1 cup unsweetened cocoa powder
2 cups all purpose flour
1 3/4 cups sugar
1 1/2 tsp baking soda
2 tsp baking powder
1 tsp salt
2 eggs
1 cup buttermilk
1/2 cup vegetable oil
2 tsp vanilla extract

1 cup of whipping cream
3 tbsp confectioners sugar

1 jar of smooth, sweetened peanut butter, such as Skippy
2 ripe bananas

For the cake:
Preheat the oven to 325. Grease and flour two nine inch cake pans and line them with parchment paper. Pour the boiling water over the cocoa powder and whisk to dissolve. In the bowl of a standing mixer fitted with the whisk attachment, combine the flour, sugar, baking soda, baking powder and salt and mix on low speed. Add the eggs and cocoa mixture and blend on low speed for one minute. Scrape down the bowl and add the buttermilk, oil and vanilla. Beat on low speed for one minute. Scrape down the bowl and beat on medium speed for one to two minutes, or until smooth.
foodblog 1463
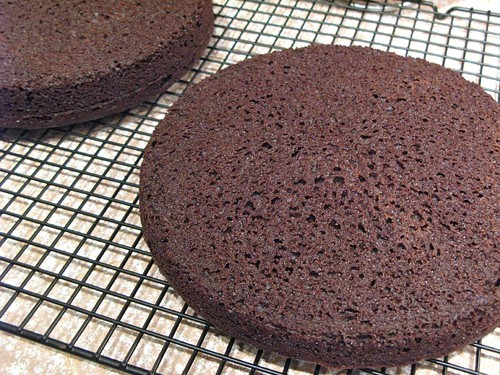
Pour the batter evenly into the pans and bake for 20 to 25 minutes, until a tester comes out with a moist crumb. Let the cakes cool on wire racks in the pans for ten to fifteen minutes, then turn out onto wire racks to cool. Remove parchment paper and let cool completely before frosting. Cakes can be stored overnight in the refrigerator wrapped in plastic.

To assemble, chill bowl and whisk of electric mixer in the freezer for fifteen minutes. Whip cream to soft peaks in the mixer, then added powdered sugar. Resume beating and whip just until stiff.

Slice banana slightly diagonally and place bottom layer of cake on serving platter. Spread bottom layer with thick layer of whipped cream leaving about 1/2 to 3/4 inch around the edge, and dot liberally with sliced banana and small dollops of peanut butter. Spread with a little more whipped cream and top with second layer of cake. Press down lightly on top of cake, just until whipped cream reaches the edges. Spread top of cake liberally with whipped cream, and garnish around the edges of the cake with slices of banana topped with a dollop of peanut butter so that each slice will have one. Dust the top with cocoa if you have some on hand - I forgot mine. You may also notice that I have only half of a cake pictured above. I lost a layer to breakage. (I probably could have saved it, but I decided to eat it instead!)

Ultimately, I myself preferred the devil's food cake, and I was surprised at how easy and delicious the peanut butter/banana/whipped cream combo was. Then again, I also really liked the orange ganache and buttercream combo. I was also just glad that both cakes turned out well given the experimental nature of the project. It gave me the confidence to sign on to make the cake for my friend Susan's birthday party coming up in a couple of weeks. She has specially requested an almond cake, and I think I have just the thing (the cake part) with a little almond extract to boost the flavor. We'll see how it turns out.

To see the rest of the Sugar High Friday entries, toddle on over to David Lebovitz' blog - it promises to be a doozy!