Showing posts with label sweets. Show all posts

Monday, January 31, 2011

Momofuku Milk Bar NYC & Compost Cookie Recipe

Momofuku Milk Bar - Downtown
Can we pretend it's last Friday? Because that's when this was supposed to be posted. A last New York post to go along with Wednesday's list of comparable delights in San Diego. I can confidently say there is nothing comparable to Momofuku or the Milk Bar in San Diego, but that's why we travel, no? The good news is that even if you can't visit the Momofuku family in NYC, David Chang is generous with his recipes and the intrepid cook can recreate many of his dishes at home. His cookbook is not quick or easy, but it's a good read nonetheless.
Momofuku Milk Bar - Downtown
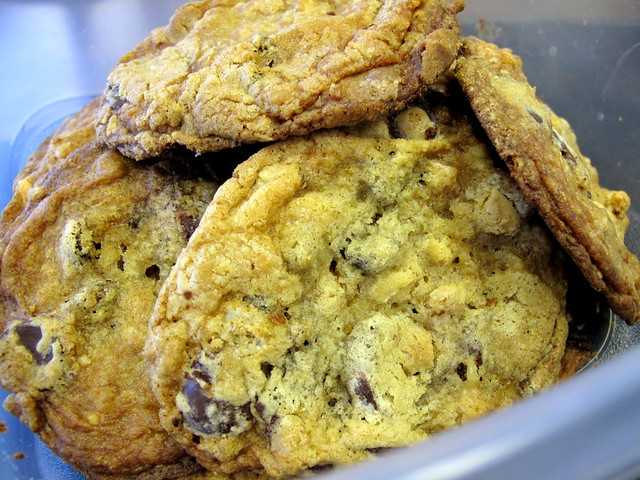
I myself have baked several batches of the famous "Compost Cookies" - so named because they're full of odds and ends including coffee grounds, potato chips and candy. The crack pie recipe is also floating around out there, here in fact. (Note that these recipes are not in the Momofuku cookbook - pastry chef Christina Tosi is working on her own book, due out soon recently released her own cookbook.) If you're feeling incredibly ambitious though, you could try the recipe for the pork buns. These consist of a meltingly (literally, it turns to liquid in your mouth) tender piece of pork belly, layered over fresh cucumber pickles, hoisin sauce and scallion greens on a sweet bun. I took this photo before I drizzled them with Sriracha, but that little bit of sweetness and heat balancing out the incredible richness of the pork in these buns is one of the best single mouthfuls of food I've experienced in recent memory. (To get the full effect, I recommend washing them down with a chilled can of Porkslap beer, available at the counter.)
Pork Buns at Momofuku Milk Bar
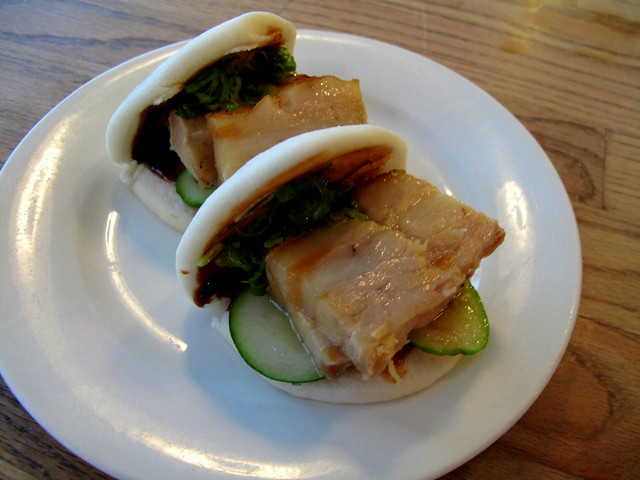
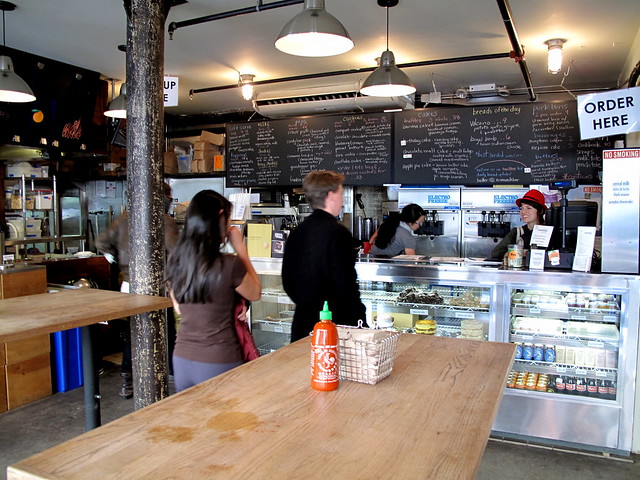
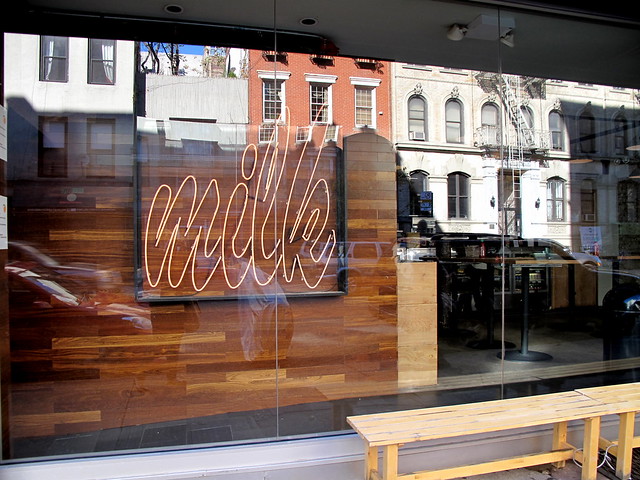
The photos above were taken at the Second Avenue Milk Bar - the original location next to Momofuku Ssam Bar. The uptown location I mentioned earlier does not offer the pork buns or beer - but focuses solely on the sweets. Both offer at least two flavors of the famous soft serves including unusual seasonal flavors like plum, lemon verbena, french toast, donut, cereal milk, carrot cake, red velvet, etc. I tried the dulce de leche at the East Village location - it had a wonderful velvety texture and tasted just like salted caramel.
IMG_1211
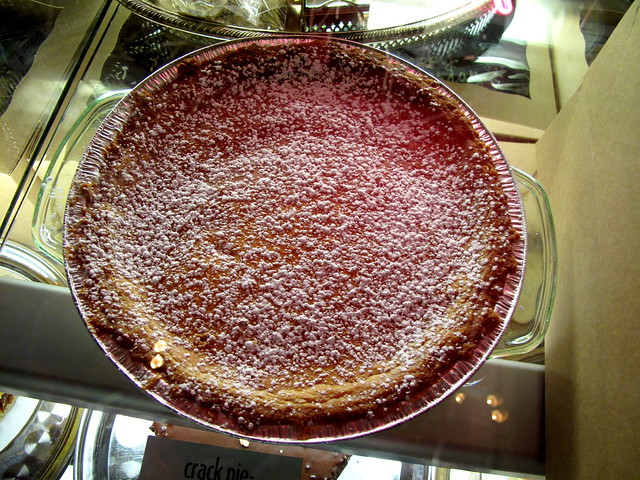
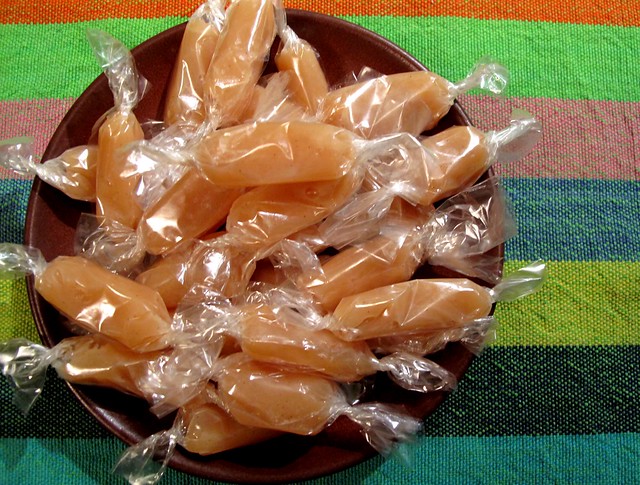
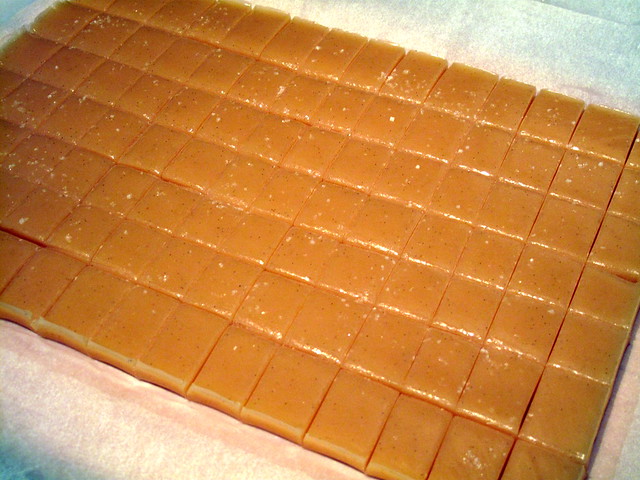
The Crack Pie - a thin, superrich layer of sugar and butter baked over an oatmeal crust - is available at both locations both as a whole pie and packaged individual slices. I bought several of the boxed slices to take home and distribute as gifts. I also bought a few slices of their grasshopper and candy bar pies, but found them disappointing. I didn't try the cakes since they are sold whole - but their "cake truffles" made from scraps are sold three to a package - I especially liked the malted chocolate. Overall, I liked the concept and the adventurous spirit of the place as much or more than some of the offerings.
Momofuku Ssam Bar wall
Since my visit to the East Village shop was on the day I flew home, I picked up a few of the savory creations - a reuben croissant stuffed with corned beef, cabbage and swiss cheese, and another stuffed with kim chi and bleu cheese - and took them home (I packed them in the thermal bag with my smoked salmon from Russ and Daughters.) We had them for dinner the next night - warmed to melt the cheese - alongside a salad, and I was glad I'd gone to the trouble to schlep them home. Ironically though, I discovered I like the Compost Cookies that I make at home better than the ones from the bakery. I use the recipe below, which I adapted from the one on Adam's blog The Amateur Gourmet.  Enjoy!
Compost Cookies
Momofuku Milk Bar Compost Cookies
adapted from Christina Tosi's recipe as it appeared on Regis & Kelly's website and The Amateur Gourmet

Ingredients:
1 cup butter (two sticks) unsalted, soft at room temperature.
1 cup granulated sugar
3/4 cup light brown sugar
1 tsp vanilla extract
2 large eggs at room temperature
2 cups all purpose flour
2 tsps baking powder
1 tsp baking soda
2 tsps Kosher salt
1 cup chocolate chips
2 cups of sweet baking ingredients - such as chocolate chips, butterscotch chips, heath toffee chips, peanut butter chips, chopped candy, etc. (after much experimenting, my favorite combo is 1 cup dark chocolate chips and 1/2 cup each of heath chips and chopped peanut butter cups or peanut butter chips)
1.5 cups coarsely chopped salty snack foods, such as pretzels, potato chips, crisp rice cereal, etc.

1. Place the butter, sugar and salt in a stand mixer with the paddle attachment. Beat on high for two to three minutes until well blended, scraping the bowl down as needed. While this is happening, stir together the baking powder, baking soda and flour.

2. Lower the speed and add the eggs and vanilla to the butter mixture, beating to combine. Then set a timer for ten minutes and turn the mixer up to medium-high speed. Do your nails, wash the dishes, whatever you want. During this time the mixture will lighten significantly in color and double in volume and the sugar will dissolve completely. (Do NOT skimp on the time, even if it looks like this has already happened. Trust me.)

3. When the timer goes off, lower the speed and gradually add the flour mixture. Stir by hand or blend on low speed just until no traces of flour remain, about 20 seconds.

4. Stir in your chopped candy and snack foods and stir in by hand or blend a couple of spins on low speed - just long to distribute them through the dough.

5. Chill the dough for at least one hour in the refrigerator or freezer before baking. (To speed this process, you can scoop the dough onto a parchment lined cookie sheet and place the sheets in the freezer or fridge until well chilled.)

6. To bake, preheat the oven to 375 degrees. Scoop 1.5 inch balls of chilled dough onto a cookie sheet lined with parchment (I think it works better than Silpats for these cookies) and bake for about 9-12 minutes. They will crackle and puff in the middle. Take them out just when they no longer look raw in the middle and the edges are nice and brown. They will flatten and continue to brown outside the oven. (You may have to experiment with the first batch, if they are browning too fast, turn the oven down to 350 and bake a bit longer.)

7. Try not to eat the entire batch in one sitting!


Monday, December 20, 2010

Vanilla Bean Fleur de Sel Caramels {A Recipe}

Fleur de Sel Vanilla Bean Caramels
I cannot tell you how long I've been meaning to do this. Four, maybe five years?   Since I decided to scale back on my baking this year, I finally had time to try homemade caramels again.  I attempted these once several years ago - but I overcooked the caramel and ended up with a hardened mass once it had cooled.  This time I might have been a little overly cautious - these are an eensy bit soft and could be just a smidge darker, but they are still dangerously delicious. As it turns out - as long as you don't burn the sugar, and don't cook the caramel to the point you can't chew it, there is a pretty good-sized range wherein success can be achieved here.  I know this recipe will scare some of you - it scared me for the longest time, but honestly, the hardest part has been keeping my hands off of them long enough to get them to their recipients.
Vanilla Bean Fleur de Sel Caramels
There are a few things you will need before you start.  An accurate digital thermometer and cellophane or wax paper caramel wrappers are essential.  You also need a large heavy pot and a wooden spoon, and one more thing - patience.  The sugar can take a long time to turn the right shade of brown, and if you turn up the heat too high to get it moving, it can burn.  If you overcook it, it will turn inedibly bitter - you'll know it's gone too far if it turns the slightest bit reddish.  The good news is it's pretty hard to overcook the sugar in this recipe because it's tempered with some water and corn syrup. This helps it cook more evenly, and prevents crystallization.  (If you object to corn syrup you can use brown rice syrup or Lyles Golden Syrup - they will  serve the same purpose.)  When you add the hot cream to the sugar mixture, it will take a few minutes to come to temperature, but when it starts moving, it will move fast - so definitely keep an eye on the thermometer as you stir.  This recipe makes a lot, but certainly not a ton.  I'm having absolutely no trouble giving them all away - and if I had the time, I'd make another batch!
Vanilla Bean Fleur de Sel Caramels
Vanilla Bean Fleur de Sel Caramels (Edited 12.19.11)
adapted from the Barefoot Contessa

Ingredients:
3 cups sugar
1/3 cup light corn syrup
1/3 cup water
2 cups heavy cream
1 1/2 sticks good quality unsalted butter
1 heaping teaspoon Maldon or other good quality sea salt, plus fine fleur de sel for sprinkling.  (I used Fleur de Sel de Guerande)
1 teaspoon vanilla extract or half a vanilla bean (note they are added at different stages of the recipe)  .
neutral vegetable oil

special materials: candy or caramel wrappers , a probe thermometer, a large, heavy pot, parchment paper.

Method:
Line a 9x17 inch baking pan with parchment paper and very lightly coat the paper with vegetable oil or butter.

In a large, heavy pot with high sides (a stock pot is good for this), cook sugar, corn syrup and water over medium/high heat until the mixture turns a deep golden brown.  Do not stir, just swirl the pot and tip it to see the color. 

In the meantime, melt the butter in a small saucepan and add the cream, the seeds of half a vanilla bean (if using)  and 2 tsp. sea salt.  Bring just to a simmer.

When the sugar is cooked to the desired degree of doneness (based on the color) pour the cream mixture  into the pot.  The mixture will bubble up and steam vigorously.  Cook, stirring continuously with a wooden spoon, until the mixture registers 245 on a candy thermometer.  Stir in the vanilla extract (if using) and generous teaspoon of salt.

Immediately pour the hot caramel into your parchment lined pan.  Sprinkle evenly with the fine fleur de sel, and allow to cool until set.   (It can also be refrigerated - coat it with lightly oiled saran wrap to prevent it from getting sticky.)

When the caramel has set, score and cut it into little pieces just a little bit larger than 1 inch square (don't worry about making them perfect - they'll squish in the wrappers)  and wrap them in cellophane or wax paper squares.  twisting the ends closed.  (If you have a friend or two to help with this, it could be a great little coffee-klatsch activity.) 

Store them in the fridge to extend their longevity - then give them as gifts and wow your friends with your homemade candy prowess!   

p.s. - I also made Peppermint Bark.  This recipe is the best on the planet.  The contrast of the harder white chocolate against the slightly soft ganache filling is delightful.   I use Peppermint Oil instead of extract (just because that is what I had) one drop in the white chocolate and 2 in the dark (per batch).  I always at least double the recipe and recommend you do too - it disappears fast!

*EDIT* I've made these a few times since this post was written, and I have made a few edits to the recipe based on my experience.  For one thing, I recommended vanilla paste for an addition - but I think vanilla extract and vanilla bean are more common and easier to use, so I've modified the recipe to use those.  I also recommend cooking the sugar to a darker color, and adding a little less salt to the caramel mixture, since they will also be sprinkled with salt.

Tuesday, December 14, 2010

Tell Tale Preserve Co. Update

 
A few months ago, I told you about a new enterprise in San Francisco called the Tell Tale Preserve Co.  Pastry Chef William Werner anticipates opening his cafe this Spring, but in the meantime, he is selling sweet and savory pastries, confections and jams through his monthly Tell Tale Society subscription bags - and a weekly stand at the local farmers markets in San Francisco:

 
The big news though, is that through the month of December, he's also running a "popup shop" - called the Tell Tale Trunk Show,  at Big Daddy Antiques in San Francisco - which looks like a pretty cool place all on its own... 
 
Open 9-5 Monday - Saturday through the month of December, the shop will offer the pastries, confections and jams Chef Werner is becoming known for, as well as coffee service.  A few people I know have ordered the Society bags and sampled items from the farmers markets, and the reviews are universally positive. 
 
I finally broke down and ordered one of the Society bags for myself for January - a little treat to help alleviate the post-holiday letdown...  :)

 
There's a chance the Trunk Show could continue if it's a success, so if you're in the area, get on over there and check it out (and please report back if you do!)   If you're not in the area, you can always order a subscription bag.  You can't pick your items, but that's part of the fun of it, and I can safely say that out of the four or five that have gone out so far, there hasn't been one I wouldn't be thrilled to get!

Photos via Dessert First  - where you can also find more detailed information and background.